How to Cross a Crevasse Without a Bridge Part 1
Published on: Fri Dec 12
Discussing solutions to a difficult situation encountered by two climbers on Liberty Ridge June, 2025.
Written by Tom Skoog

Intro:
With muck season in full swing, I’ve been reading through this year’s edition of Accidents in North American Climbing, looking for instructive incidents to dissect here on the blog. One entry in the Washington section featured two climbers who were “stranded” on the wrong side of a crevasse. At first glance, it seemed like the perfect springboard for a short, technical write-up on how to handle this uncommon but important scenario.
But as soon as I started outlining it, I realized I’d need an entire blog post to cover what I wanted to. And when I tried to write that post, I discovered I was addressing so many cases and caveats that it would really need to be two.
So here we are: this is the first in a planned two-parter on how to cross a crevasse using standard glacier-climbing gear when you don’t have a snow bridge. Although rare, this situation absolutely should occupy the mind of anyone who intends to travel on serious glaciated terrain. Snow bridges collapse, and when one does, you may need to cross the crevasse anyway.
In this post, I’ll cover two of the simpler bridge-less crossings. The next installment will cover the nightmare third case. First, though, let’s look at the accident report that inspired all of this.
Avalanche and Rockfall | Stranded
At 1:30pm on June 6, Mt rainier climbing rangers were notified about a satellite SOS activation on liberty ridge. The incident commander was able to directly message two climbers, who were stranded at 9700 feet. Rockfall had hit one climber in the head. A helicopter was dispatched with two rangers, and during the short reconnaissance flight, the stranded pair was located. Plans were formulated for a short haul rescue. A team was inserted on the ridge and extricated the distressed climbers. Both were taken to Camp Schurman and on to a hospital. June 6 was one of the first days of clear skies and warm temperatures following several weeks of snowfall. The forecasted freezing level was at 13,000 feet. The climbers reported “30 to 40 avalanches throughout the day, one every eight minutes before the accident.
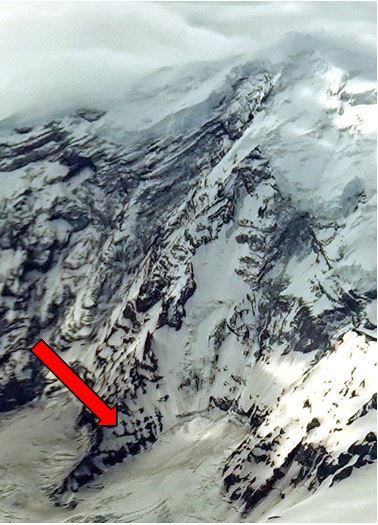
Before continuing, it’s worth addressing the obvious: the victims’ choice of climbing window. Based on the conditions described, this was not an appropriate time to climb Liberty Ridge. Natural avalanches are a surefire sign of instability. It’s unthinkable to keep pushing upward into avalanche terrain after witnessing even a fraction of that activity. That said, it sounds like the climbers eventually realized the severity of their situation and attempted to retreat, at which point they found themselves “stranded.”
The entry continues:
The climbers had been advised to adopt a self-sufficient mindset and prepare for self-rescue. They reported that an avalanche had destroyed the snow bridge across the bergschrund that they crossed on the morning of their ill-fated attempt. They said that rappelling into and climbing out of the bergschrund was the only option for descent and claimed that this prevented retreat. They further claimed that self-rescue would have required them to “push for the summit”… While the ambition to climb a major technical route is admirable…the ability to rappel into a crevasse and climb out the other side would have negated the need for a rescue that endangered rescuers.
My aim here isn’t to pile on two climbers who were already in an extremely difficult situation. Instead, I want to use this report as a jumping-off point for discussing how to actually solve the problem they faced. My hope is that the techniques and visuals I share will give people a clearer picture of what to do in this rare but consequential scenario—or at least highlight a blind spot worth addressing.
Since we’re wading into advanced material, I’m going to assume the reader already understands fundamentals like anchor construction in snow, belaying, rappelling, rope ascension, and basic ice climbing. This post reflects my experience as a climber and guide and is not definitive, universal, or a substitute for competent instruction, practice, and judgment. What you do with this information is your responsibility.
Before You Commit: Shop Around
Before committing to any one method, spend a few minutes looking for the easiest crossing. Ten minutes of traversing along the crevasse might reveal a narrower section, a hidden bridge, or a place where you can simply downclimb in and up the other side without heroic measures.
The more technical your skillset becomes, the easier it is to fixate on the fancy, time-consuming solution. But a little reassessment often reveals a path that requires no special technique at all.
Case One: Narrow Crevasse, No Bridge — Jump It
It’s not often discussed in modern literature, but jumping crevasses is a time-honored, efficient technique—especially when the far side is lower, giving you extra horizontal distance.
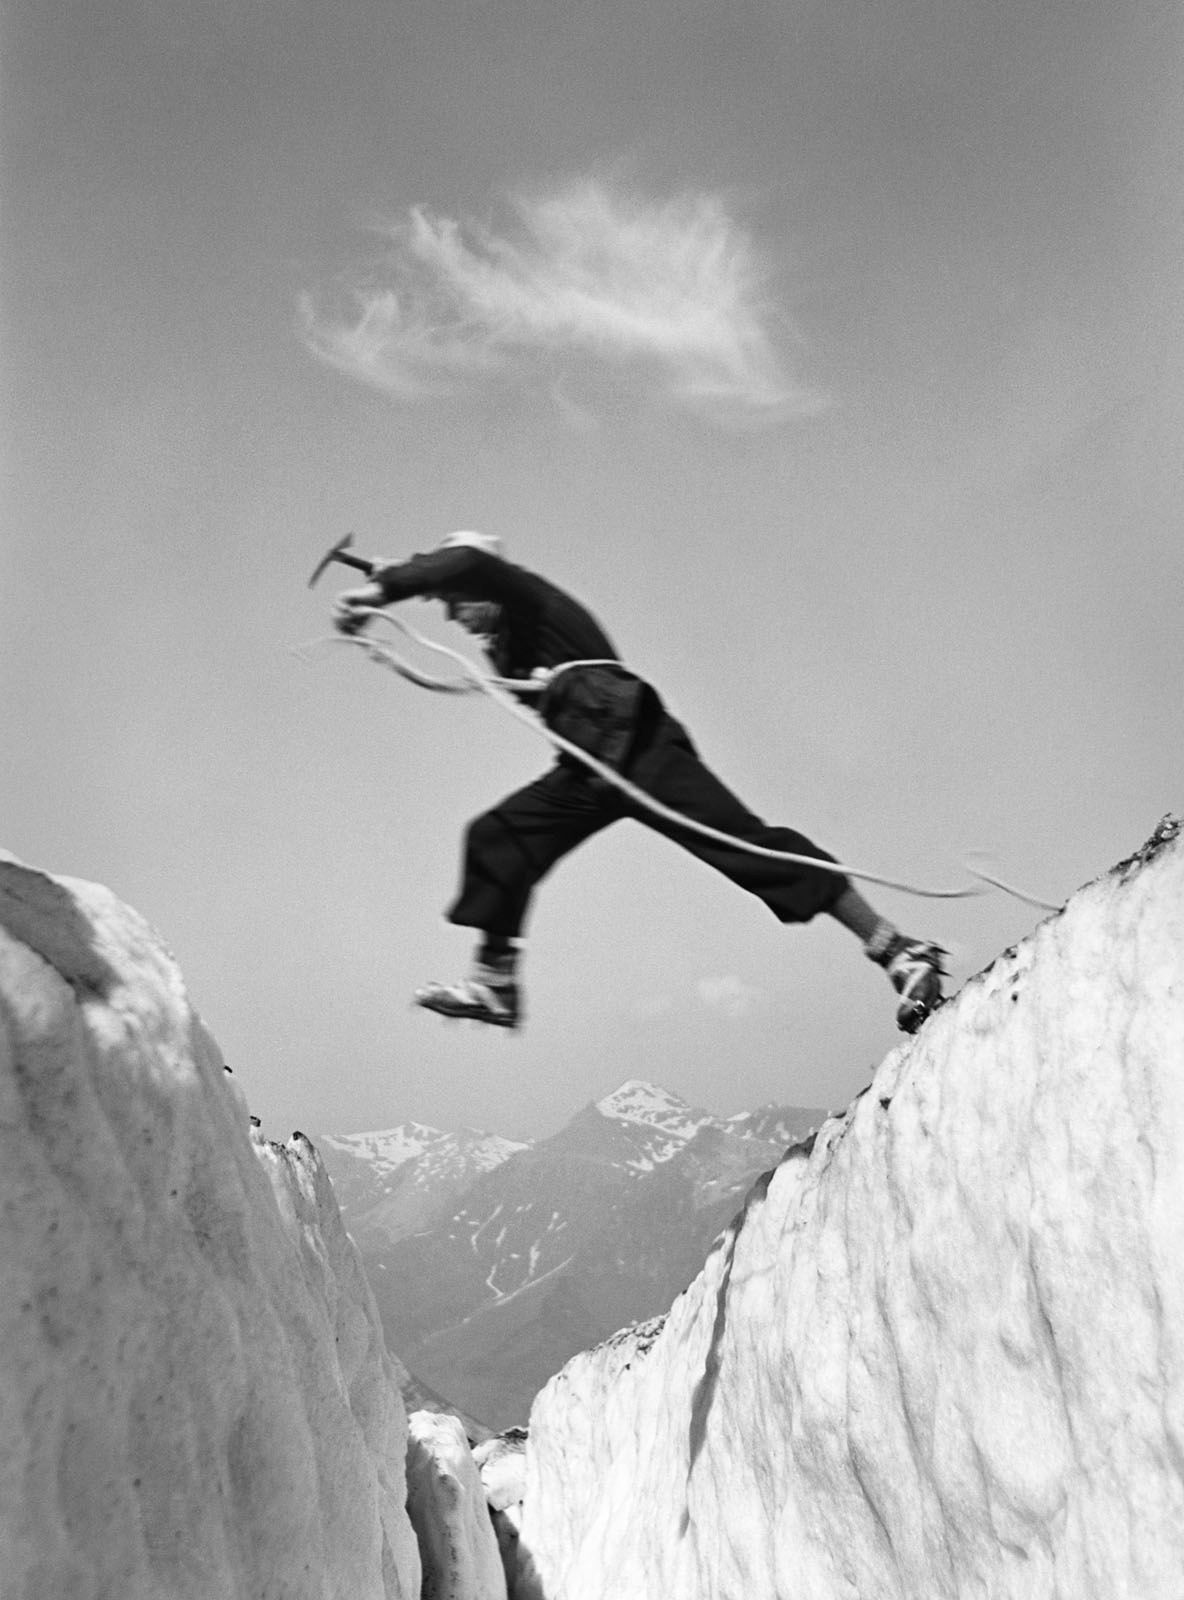
Basic flow:
- Build an anchor on your side of the crevasse.
- Belay (loosely) the first jumper across.
- Once across, they build an anchor on their side.
- Remaining team members are belayed by the leader. They can jump, or have the leader tension the rope so they can lower themselves to the far wall and ascend the rope.
Considerations (you can take or leave these suggestions as the situation demands):
- Take off crampons as these are likely to injure you if you don’t make the jump.
- Pack down soft snow to create a solid jump platform.
- Toss packs separately. You can also tow them across.
- If you have multiple followers, someone planning to jump should go last so they can remove the initial anchor.
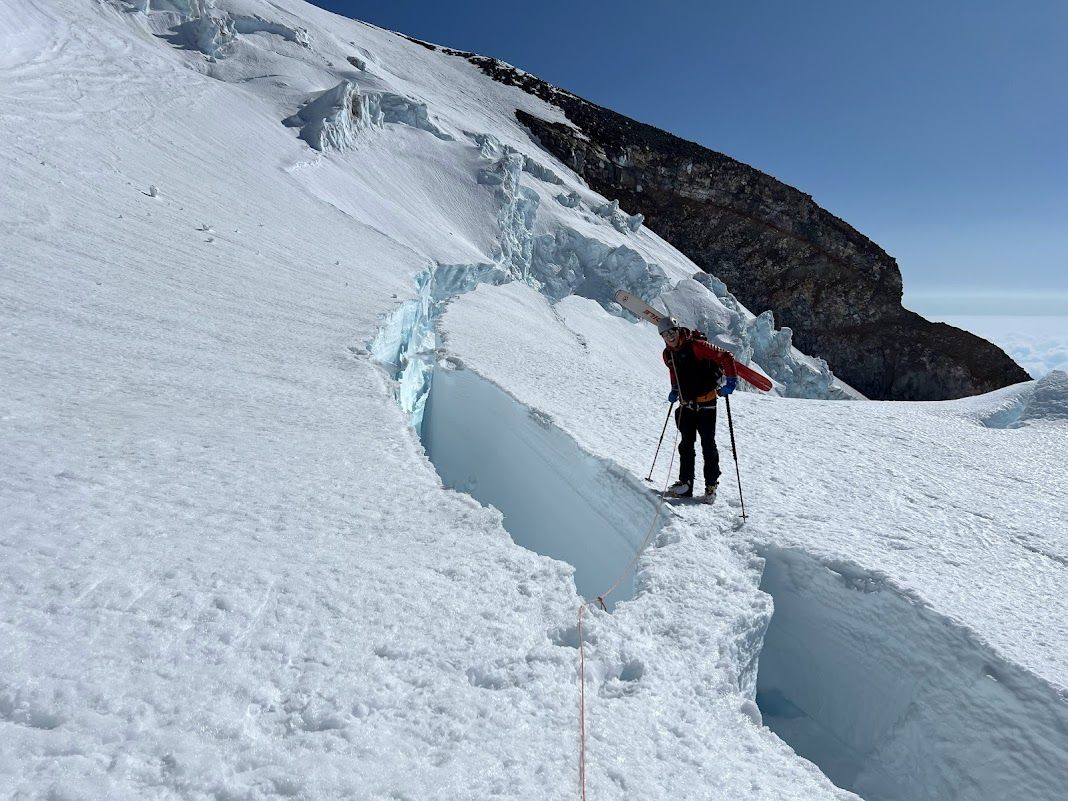
Case Two: Wide Crevasse, Shallow Bottom — Rappel In, Climb Out
When the gap is too wide to jump but shallow enough to see the bottom, your best option is usually to rappel in and ice-climb out. This is the technique most often discussed in books and online because it’s essentially just two familiar skills back-to-back.
Basic flow:
- Build an anchor on your side—ideally leaving little or no gear behind.
- Everyone rappels to the bottom.
- Commit fully, then pull the rope.
- One person leads a pitch of ice on the far wall and builds an anchor up top.
- The rest of the team climbs or ascends the rope.
Additional Considerations:
- Think carefully about your initial anchor. A V-thread is ideal. If you must build in snow, weigh whether you can spare a picket or ice axe. I would not recommend a bollard, as I think the sharp angle change could make the rope very difficult to pull. A deadman made from a stuff sack full of snow is a highly underrated option—notably used on Link Sar by the team of Steve Swenson, Graham Zimmerman, Chris Wright, and Mark Richey.
- If you’re unsure about your anchor, back it up and send your heaviest team member first. The lightest goes last and pulls the backup. For a more in depth discussion of this, check out this article from Alpine Savy.
- Once you pull your rope, you must climb out. If you have enough rope, you might begin climbing the opposite wall on one tail before fully committing and pulling the rest of the rope.
- Choose your line of ascent carefully. Look for lower-angle, shaded sections. Sun-baked walls tend to be insecure, unprotectable, and soaking wet.
- If you’re leading the exit: don’t be a hero. Clip tools, aid off screws, do whatever gets the rope up.

Wrapping Up
That was a lot—and it’s only part one. In the next part, I’ll get into the true nightmare scenario: a crevasse too wide to jump and too deep to rappel into. Until then, I hope this has given you a bit more self-sufficiency, or at least something productive to chew on while we watch yet another atmospheric river take a swing at what’s left of our snowpack.
Stay safe out there,
Tom