Lessons from Accidents In North American Climbing 2024
Published on: Tue Dec 17
Lessons and musings from the most instructive inclusions in this year’s “Accidents in North American Climbing”.
Written by Tom Skoog

Washington is a great place for outdoor recreation almost year-round. There’s deep snow to ski and ice to climb in the winter, epic spring skiing and mountaineering, summer alpine objectives, and crisp fall rock climbing. And then there’s the “muck” season. The “muck” season is my term (adapted with love from my dad’s “mush” season—used to describe the period in spring when the winter snowpack transitions to springtime diurnal conditions) for the time, usually starting in October, when precipitation is frequent but not yet cold enough to produce snow for skiing. This combination leaves the rock wet, most hiking trails foggy or rainy for weeks, and if you are brave enough to venture into the alpine, it’s sure to dust your objective in snow and leave you questioning your life choices.
Intro
Washington is a great place for outdoor recreation almost year-round. There’s deep snow to ski and ice to climb in the winter, epic spring skiing and mountaineering, summer alpine objectives, and crisp fall rock climbing. And then there’s the “muck” season. The “muck” season is my term (adapted with love from my dad’s “mush” season—used to describe the period in spring when the winter snowpack transitions to springtime diurnal conditions) for the time, usually starting in October, when precipitation is frequent but not yet cold enough to produce snow for skiing. This combination leaves the rock wet, most hiking trails foggy or rainy for weeks, and if you are brave enough to venture into the alpine, it’s sure to dust your objective in snow and leave you questioning your life choices.
Accidents in North American Climbing
Everyone deals with the muck season differently. I take a few light weeks to rest and recuperate after peak summer guiding season and spend more time with family and friends. It’s also the time of year when Accidents in North American Climbing (AINAC) comes out.
Published annually by the American Alpine Club since 1948, AINAC compiles accident reports and analyses of the year’s most notable or significant climbing incidents. It’s a sobering read, and I recommend that anyone serious about climbing in the alpine make reading it part of their practice. Although AINAC contains valuable reporting, the reader is forced to slog through many reports like the following excerpt from this year’s edition:
On July 14th at 3:45p.m., NPS personnel received a cell phone call from two young climbers stuck on Teewinot (12,330 feet). The male climbers, aged 19 and 20 years, reported that they were on a snowfield North of the Idol and Worshipper rock formations. They were carrying ice axes but did not know how to use them.
While no one (especially not me!) is immune to mistakes or being ill-prepared, reading several similar reports in a row can leave you wondering what lessons you are actually getting for your time spent reading. My intention with this blog post is to highlight three accidents from this year’s edition that I find particularly instructive. I chose these because: 1. They all involved experienced climbers. 2. They feature clear, digestible lessons that can benefit climbers simply by being aware of them. 3. They occurred during rock or alpine rock climbing. 4. No one died, though each accident was an uncomfortably close brush with death.
Let’s dive in.
Tails Too Long
Does this photo raise any alarm bells for you?
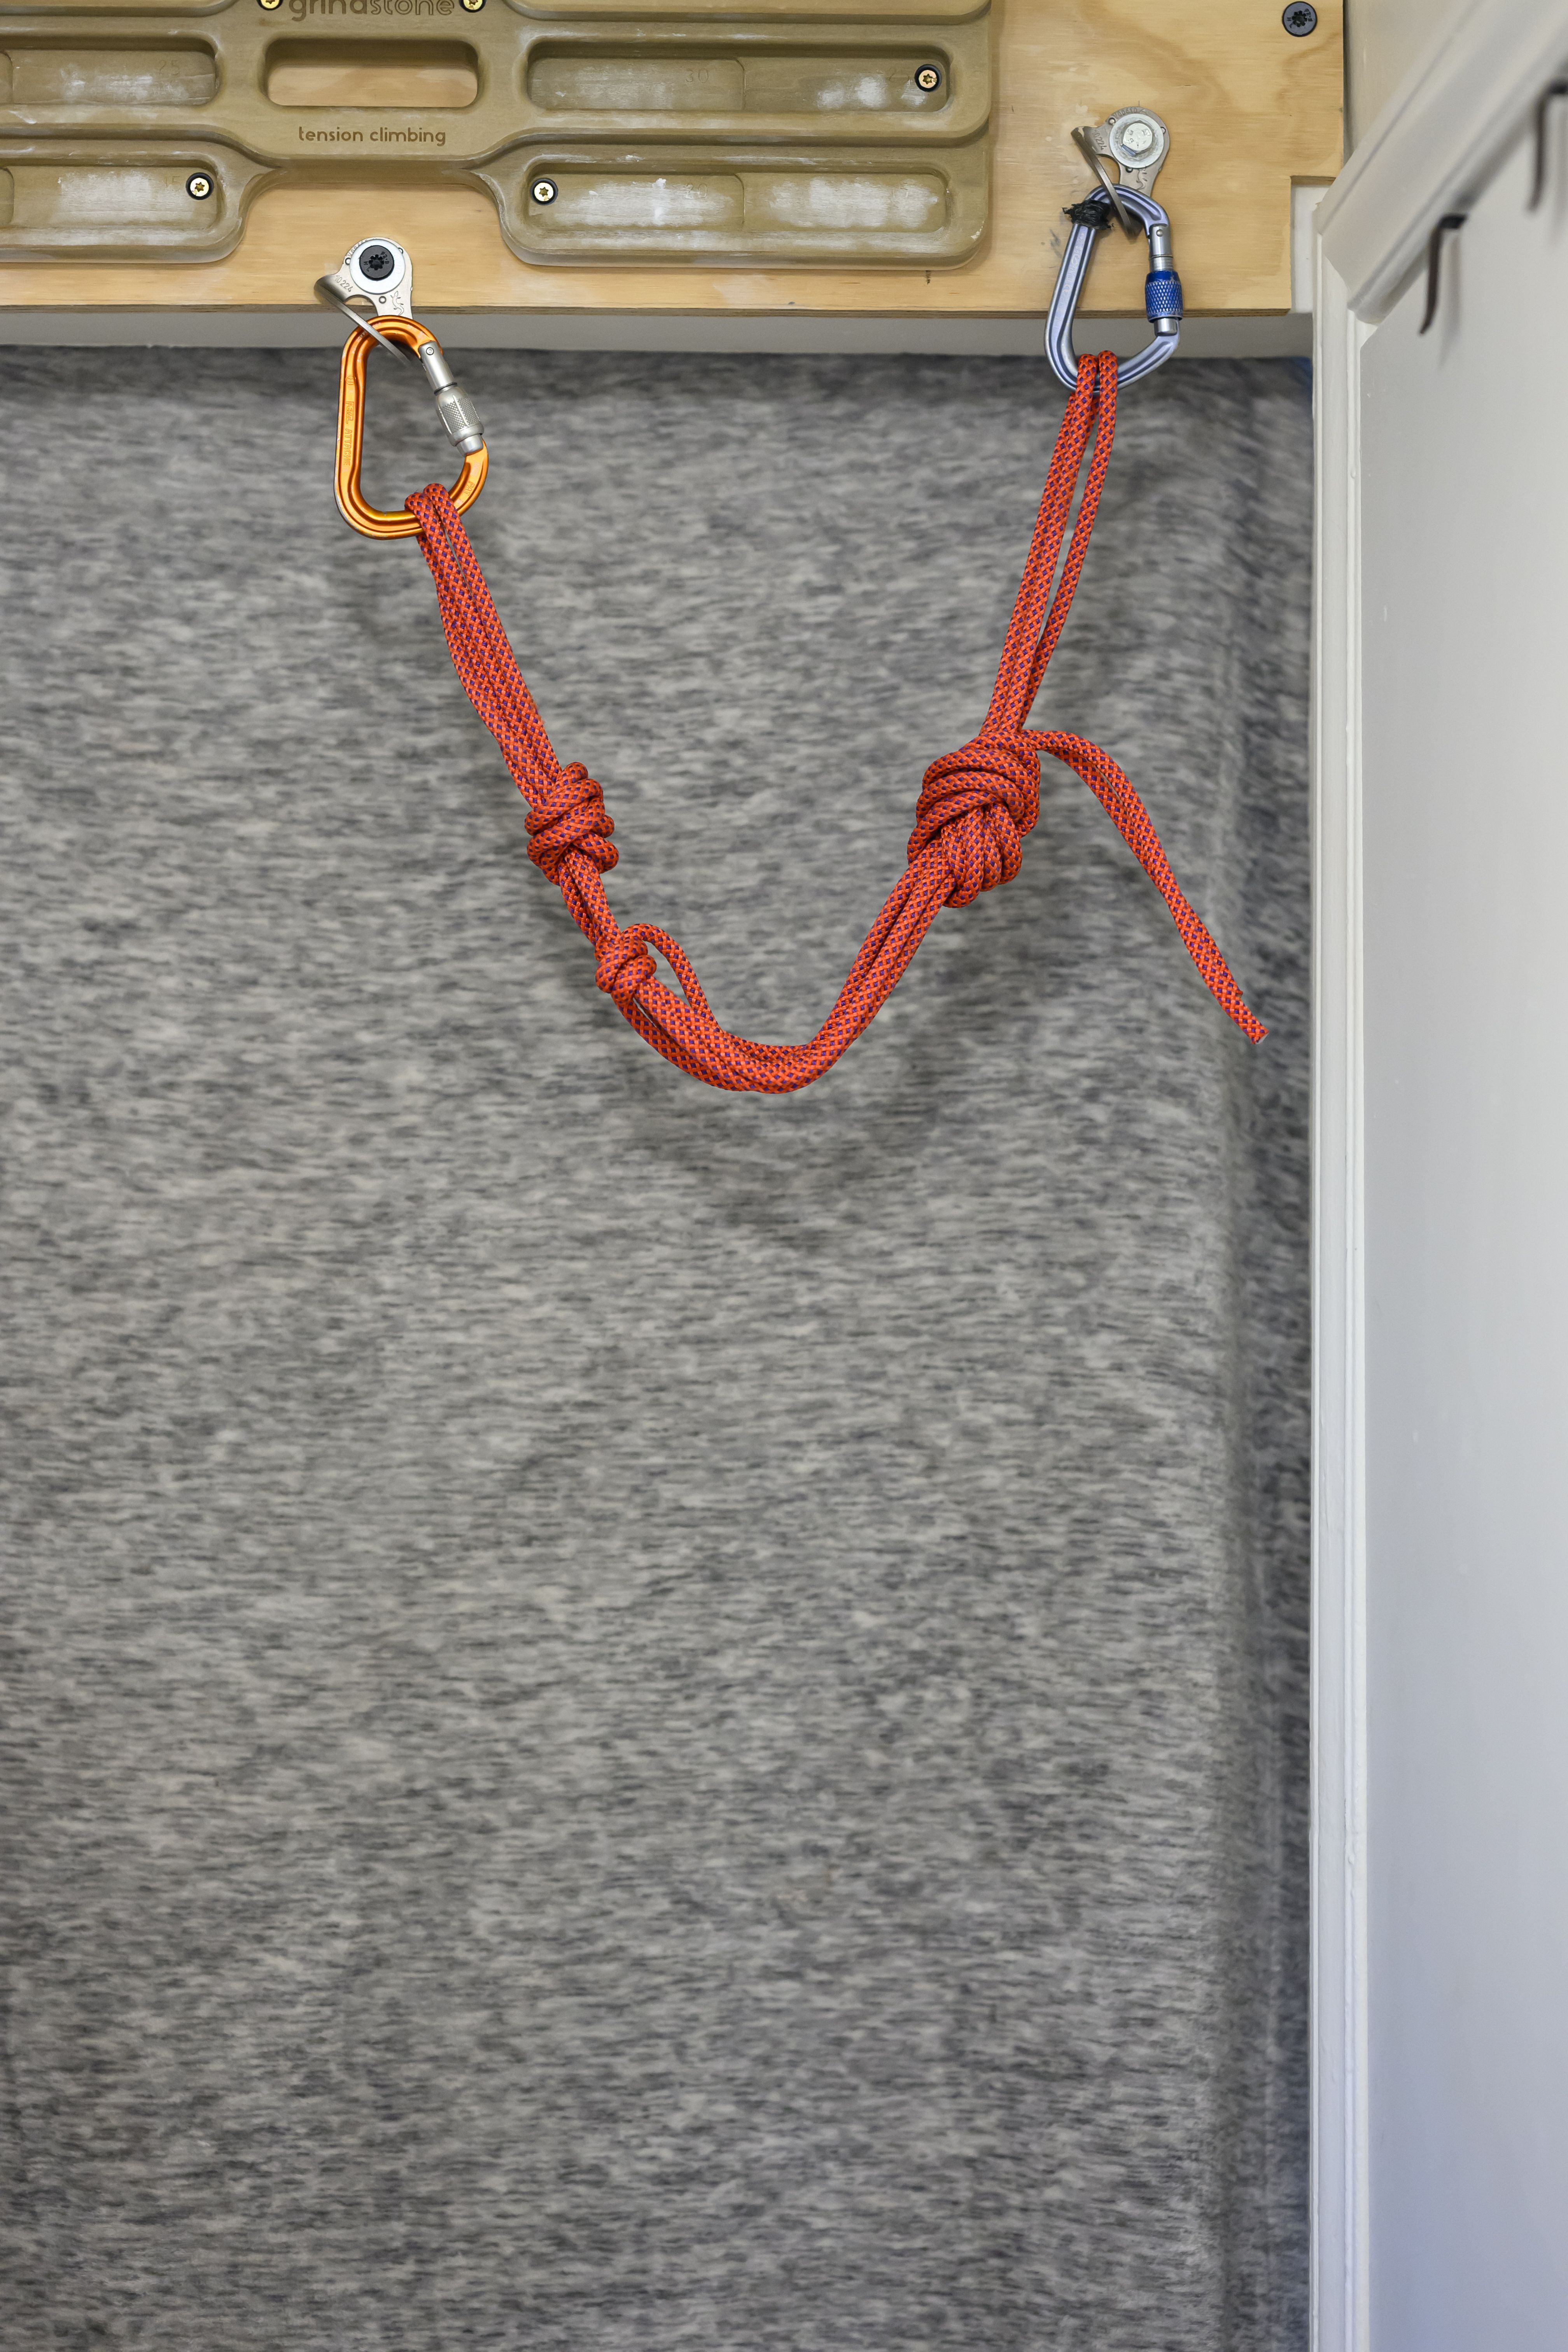
If I hadn’t read our first accident report, I might not hear any either. Now look again with the tails of this quad’s flat overhand joining knot highlighted in black.
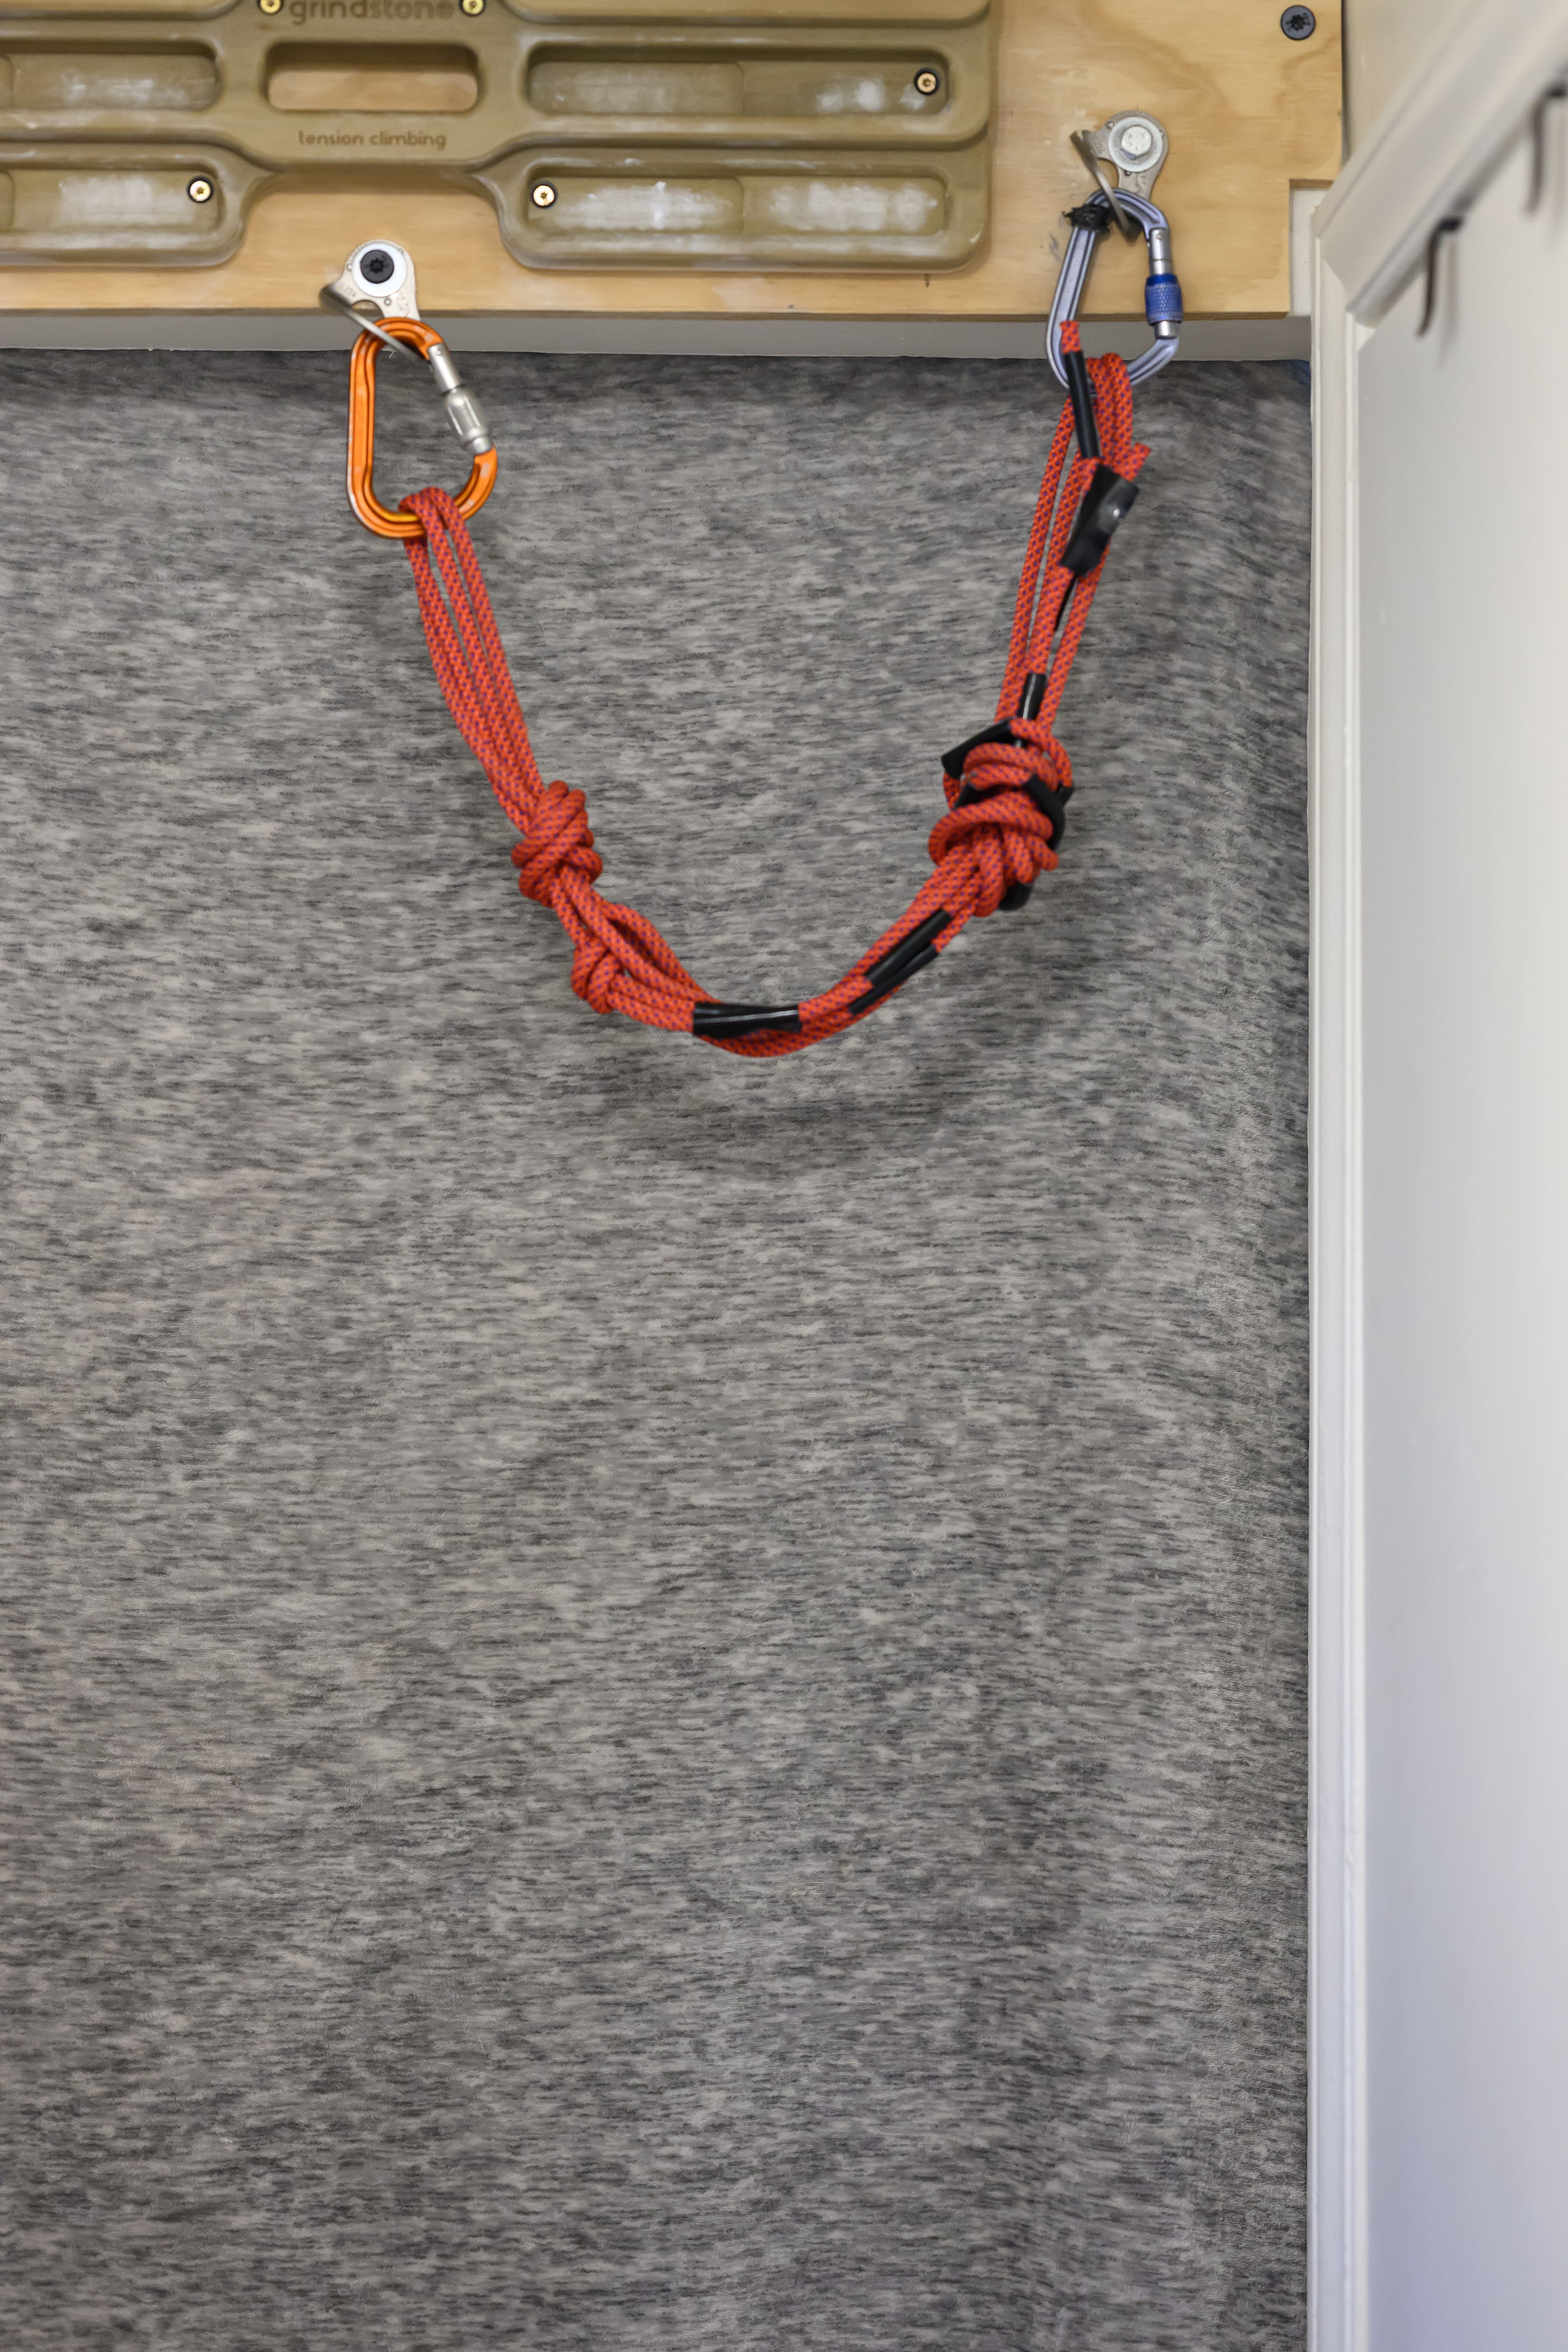
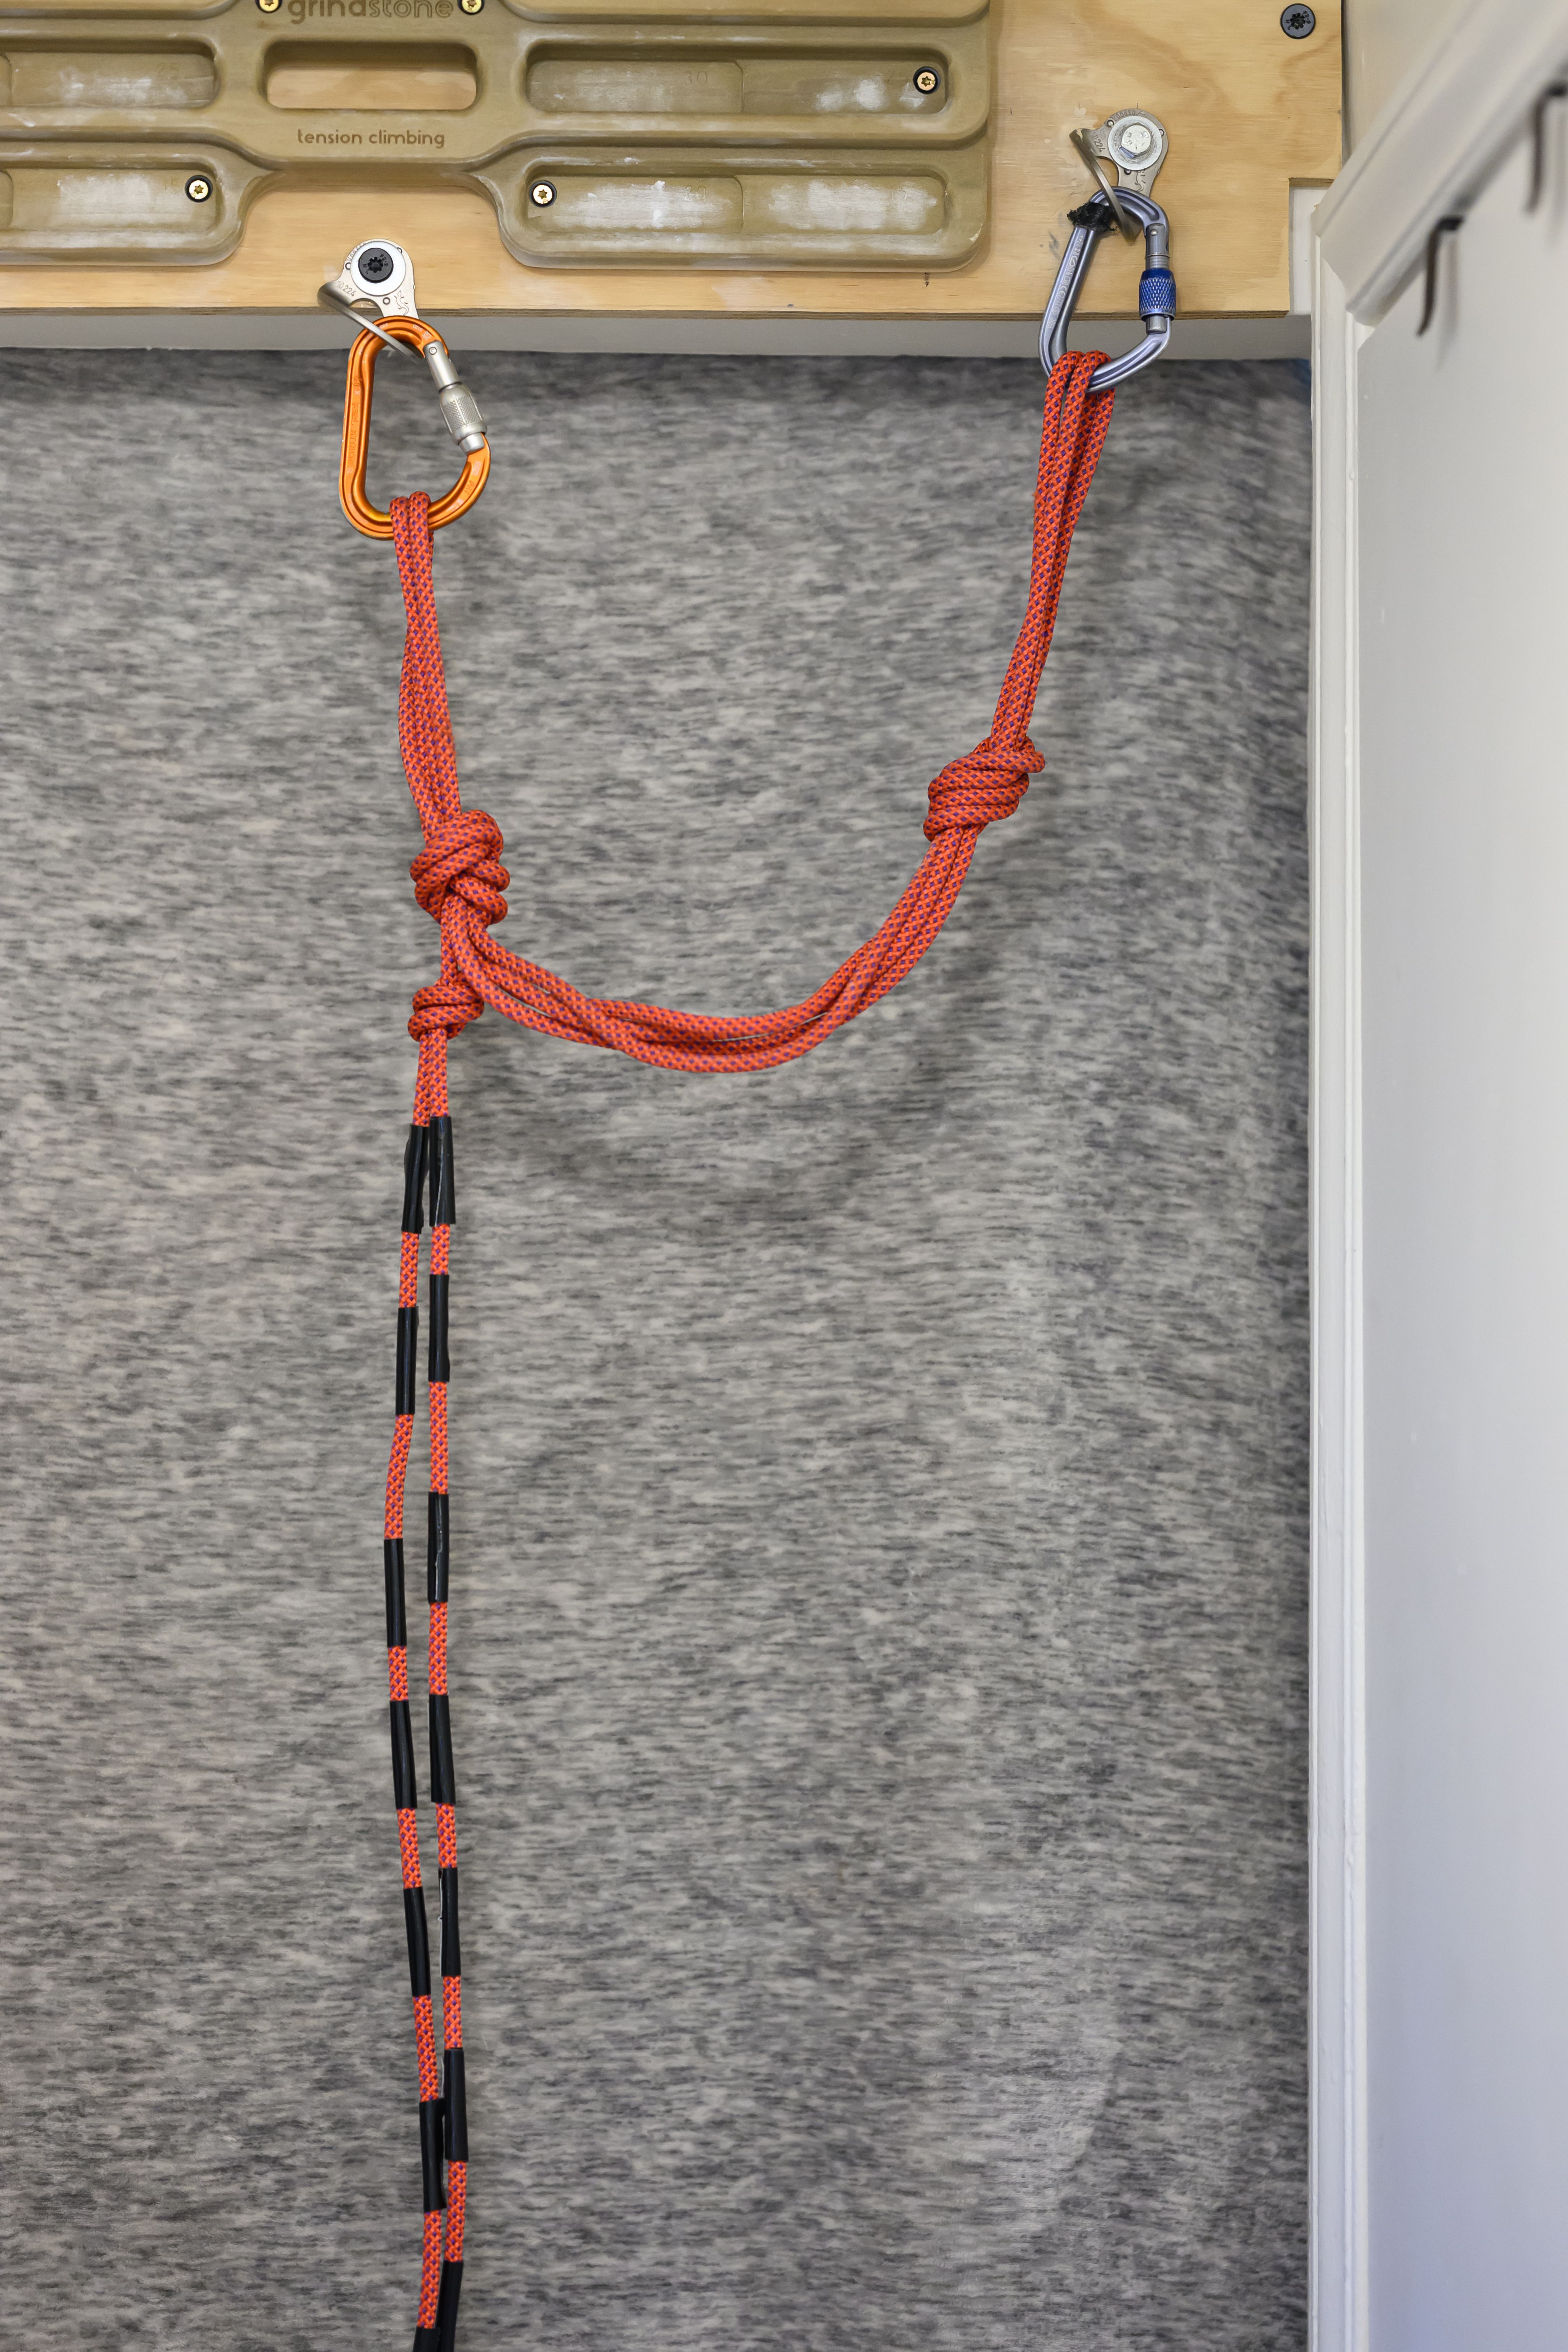
Can you see how this could go very wrong?
The first accident involved a climber from South Dakota setting up a top rope for two friends. The climber had tied extra-long tails in the joining knot of their quad anchor and inadvertently tucked those tails into one of the two overhand knots on either end, forming an unsecured loop. When the climber clipped into this loop and weighted it, the tails pulled through and he hit the ground.
Lessons
- Do not tuck the tails of your joining knot into either knot of your quad anchor. This arrangement creates the possibility of a dangerous mistake, especially when distractions or fatigue are present.
- Excessively long tails in a flat overhand knot are unnecessary. While many folks have been taught that the failure mode of a flat overhand is “rolling” or “capsizing” such as is shown here, the force required to capsize a flat overhand is at least 60% of the rope’s breaking strength. For a 7mm nylon accessory cord, that’s over 1,500 pounds! In a quad anchor setup, the load is distributed across multiple strands, meaning it’s unlikely a flat overhand would roll under anything resembling normal circumstances.
I attribute this push for long tails to the very understandable human need to feel in control of our safety. Making knot tails extra-long feels like a dial we can turn toward greater security, but this feeling is mostly illusory. Instead, keep your flat overhand tails around 12 inches (30 cm)—about the length of your forearm—and tension the individual strands to prevent the knot from settling when loaded.
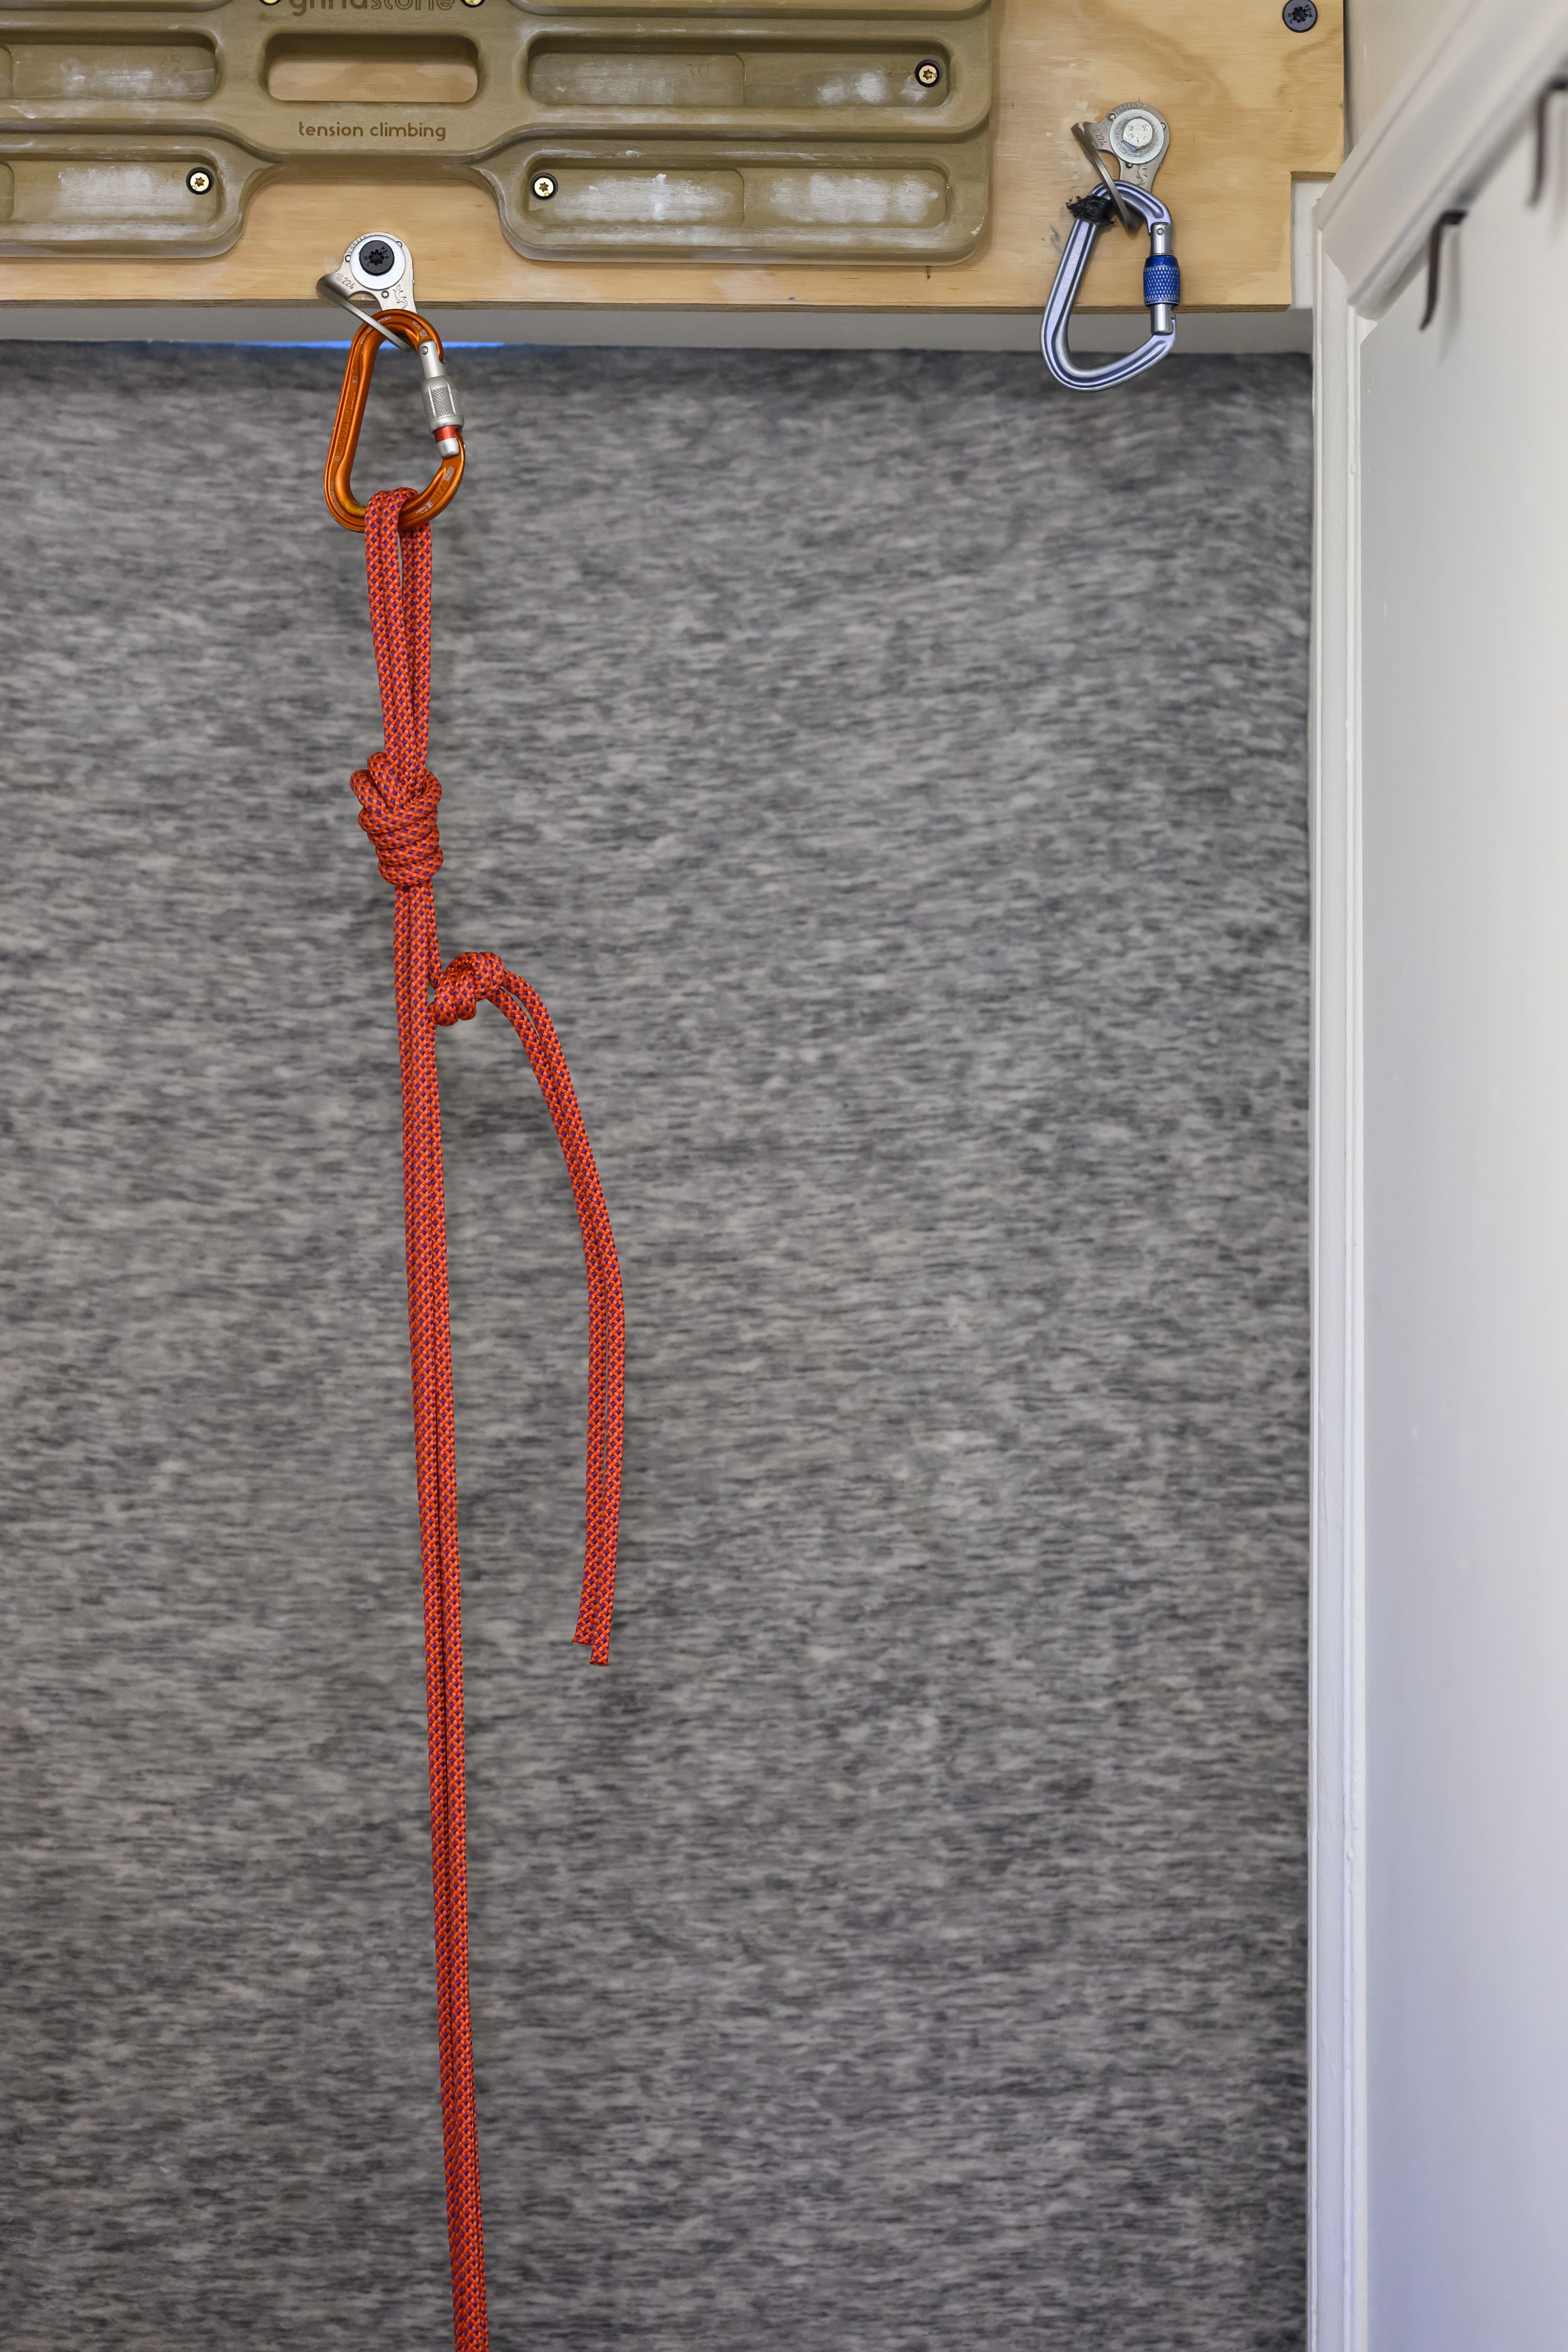
The idea that more tail is going to make you safer is fantastical and may even put you at greater risk of an accident, as this example demonstrates.
Rappelled on the Wrong Tail
Quick quiz: Which side of this knot should you rappel on?
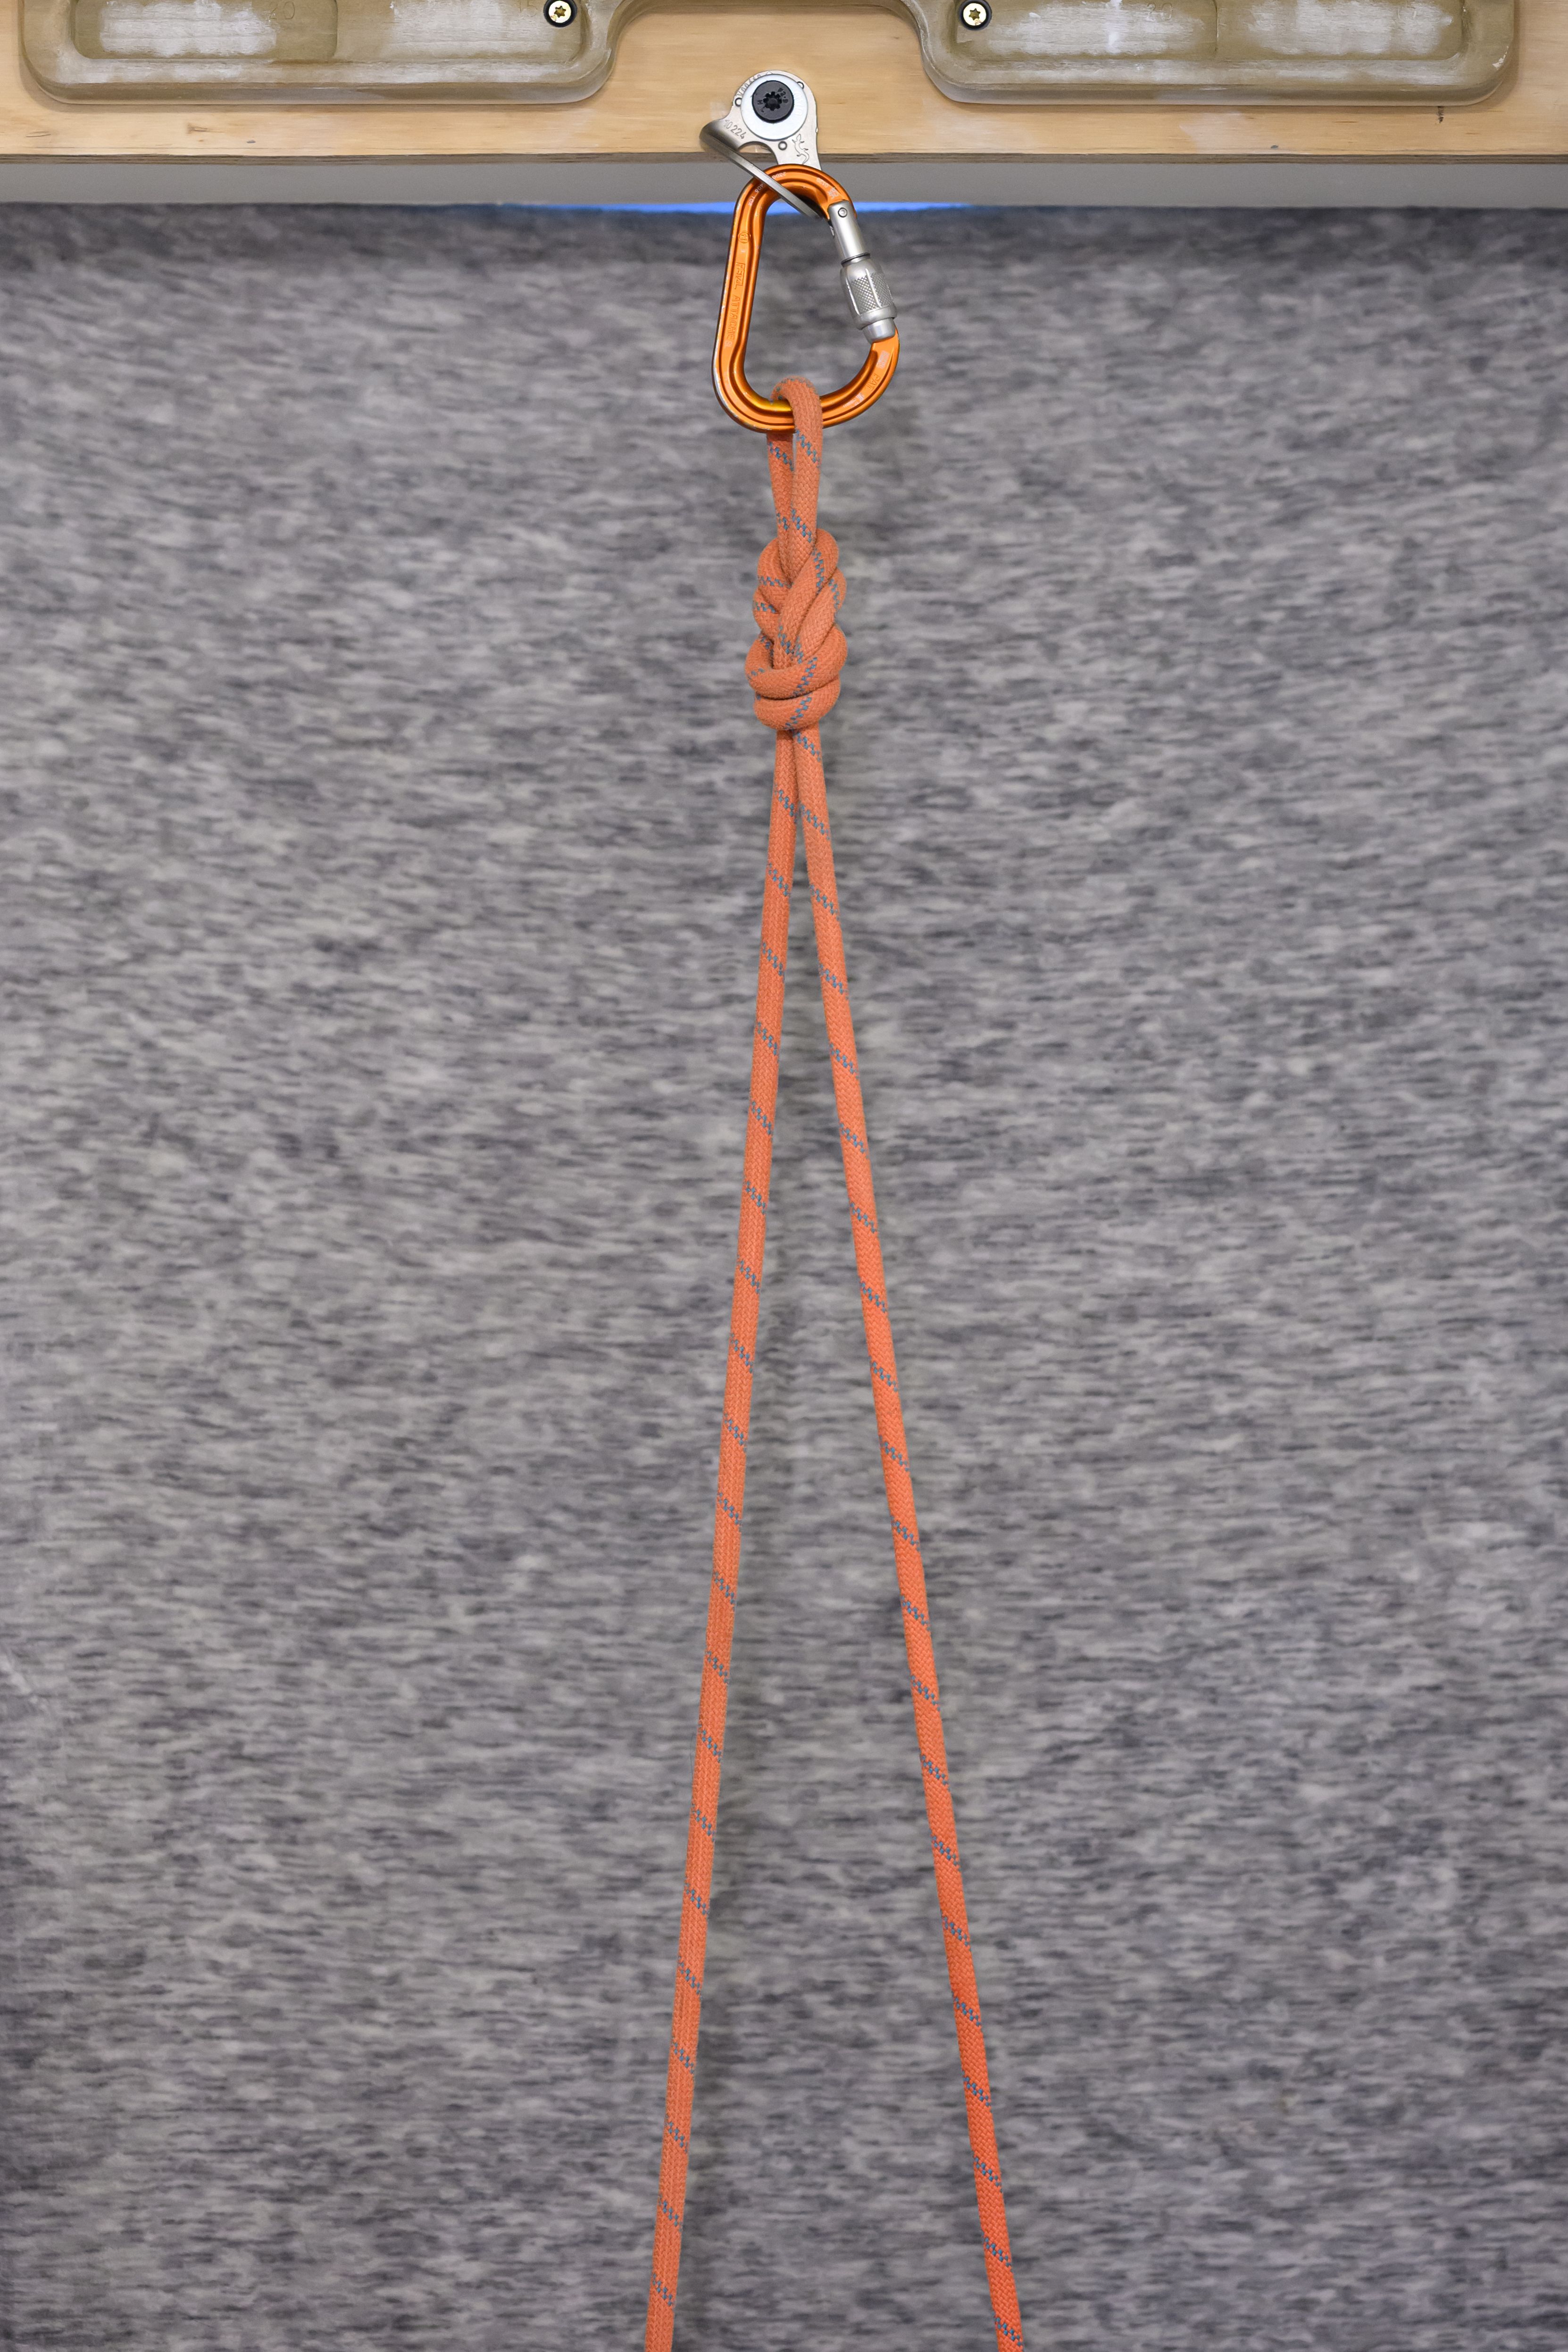
Our second accident involved a very experienced climber and first ascensionist who accidentally set up their rappel on the extra-long tail of a figure-eight knot. The rope was piled on a stance beneath them, obscuring the weight difference between the side with three feet of rope and the side with 150 feet.
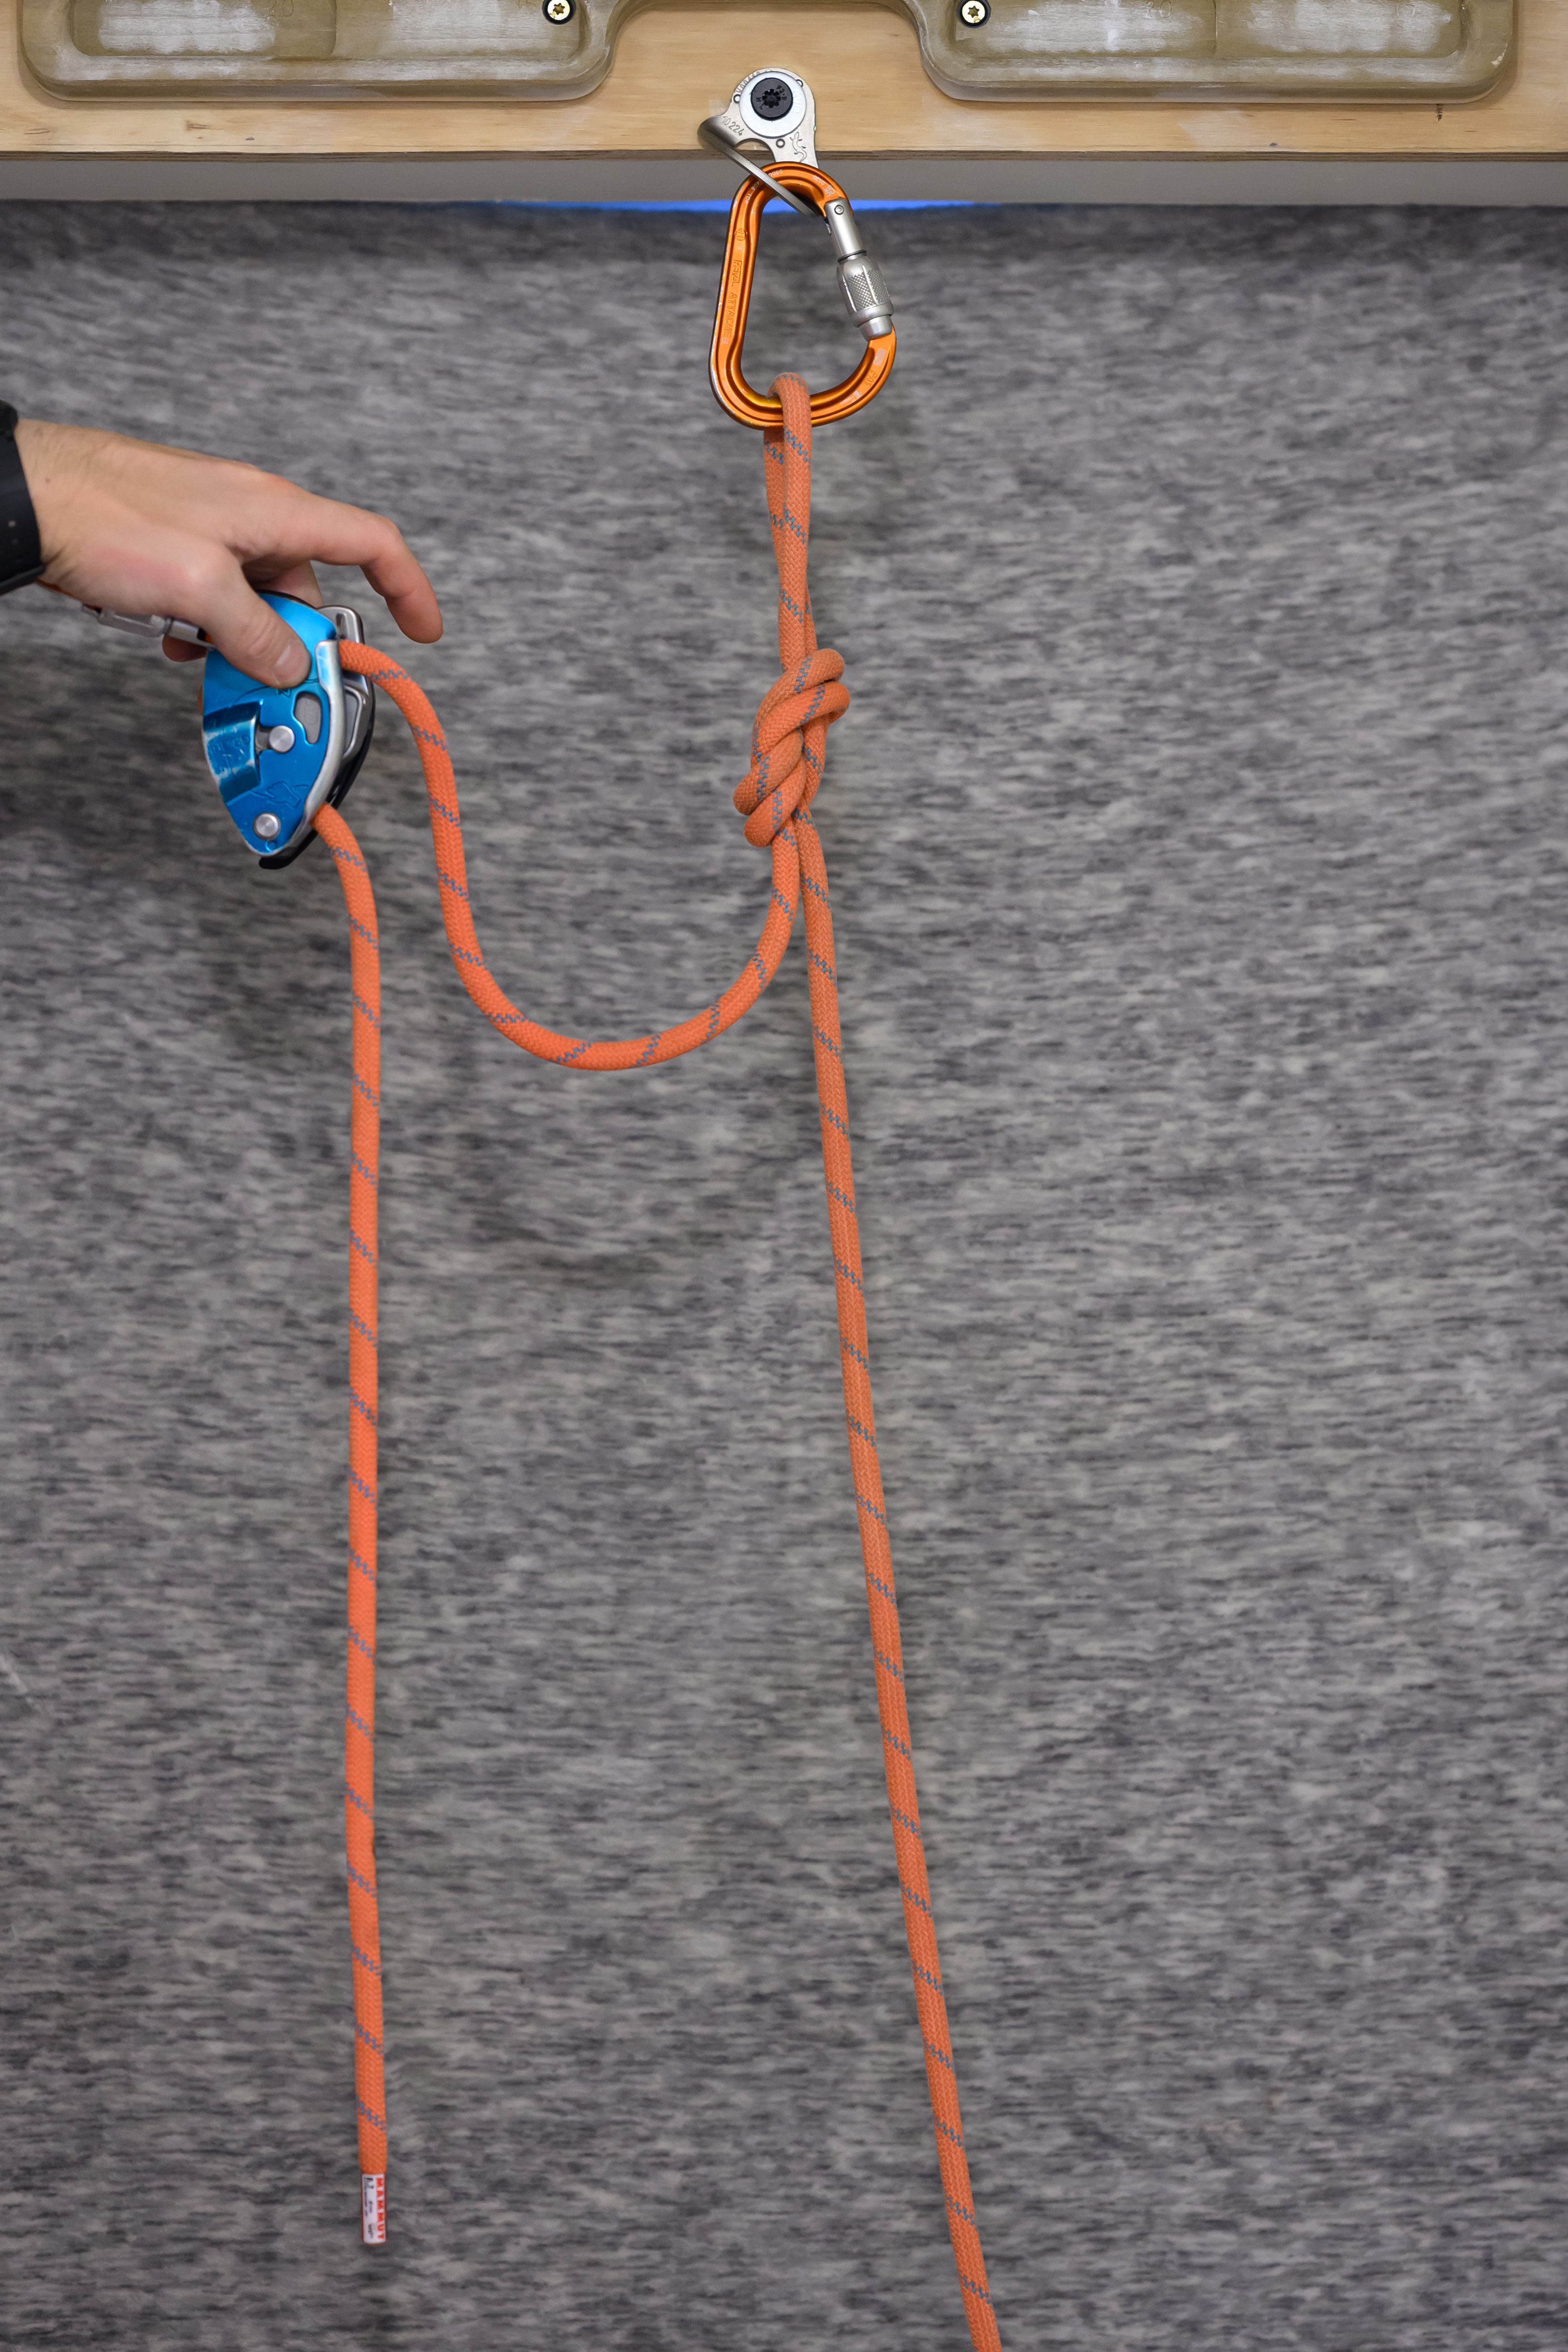
When he began to rappel, the unsecured end fed through the device, and he fell, sustaining multiple injuries.
Lessons
Ultimately, I included this accident not because I’m on some sort of “tails are too long nowadays” bent, but to highlight a recurring theme in climbing accidents. This accident rhymes with the advice many of us receive as new lead climbers: keep your tie-in knot well-dressed, with a tail that isn’t overly long, because it’s possible to mistake the tail for the belayer’s strand and clip it while lead climbing. While confusing the two seems improbable, accidents like this show that it can happen to even the most experienced climbers. Young or old, novice or seasoned, people make this mistake in a variety of scenarios—rappelling from above, climbing from below, and beyond. The victim in this case continues to enjoy a long climbing career, and my hope is that all of you will do the same. To help ensure that, keep your figure-eight tails between six and nine inches.
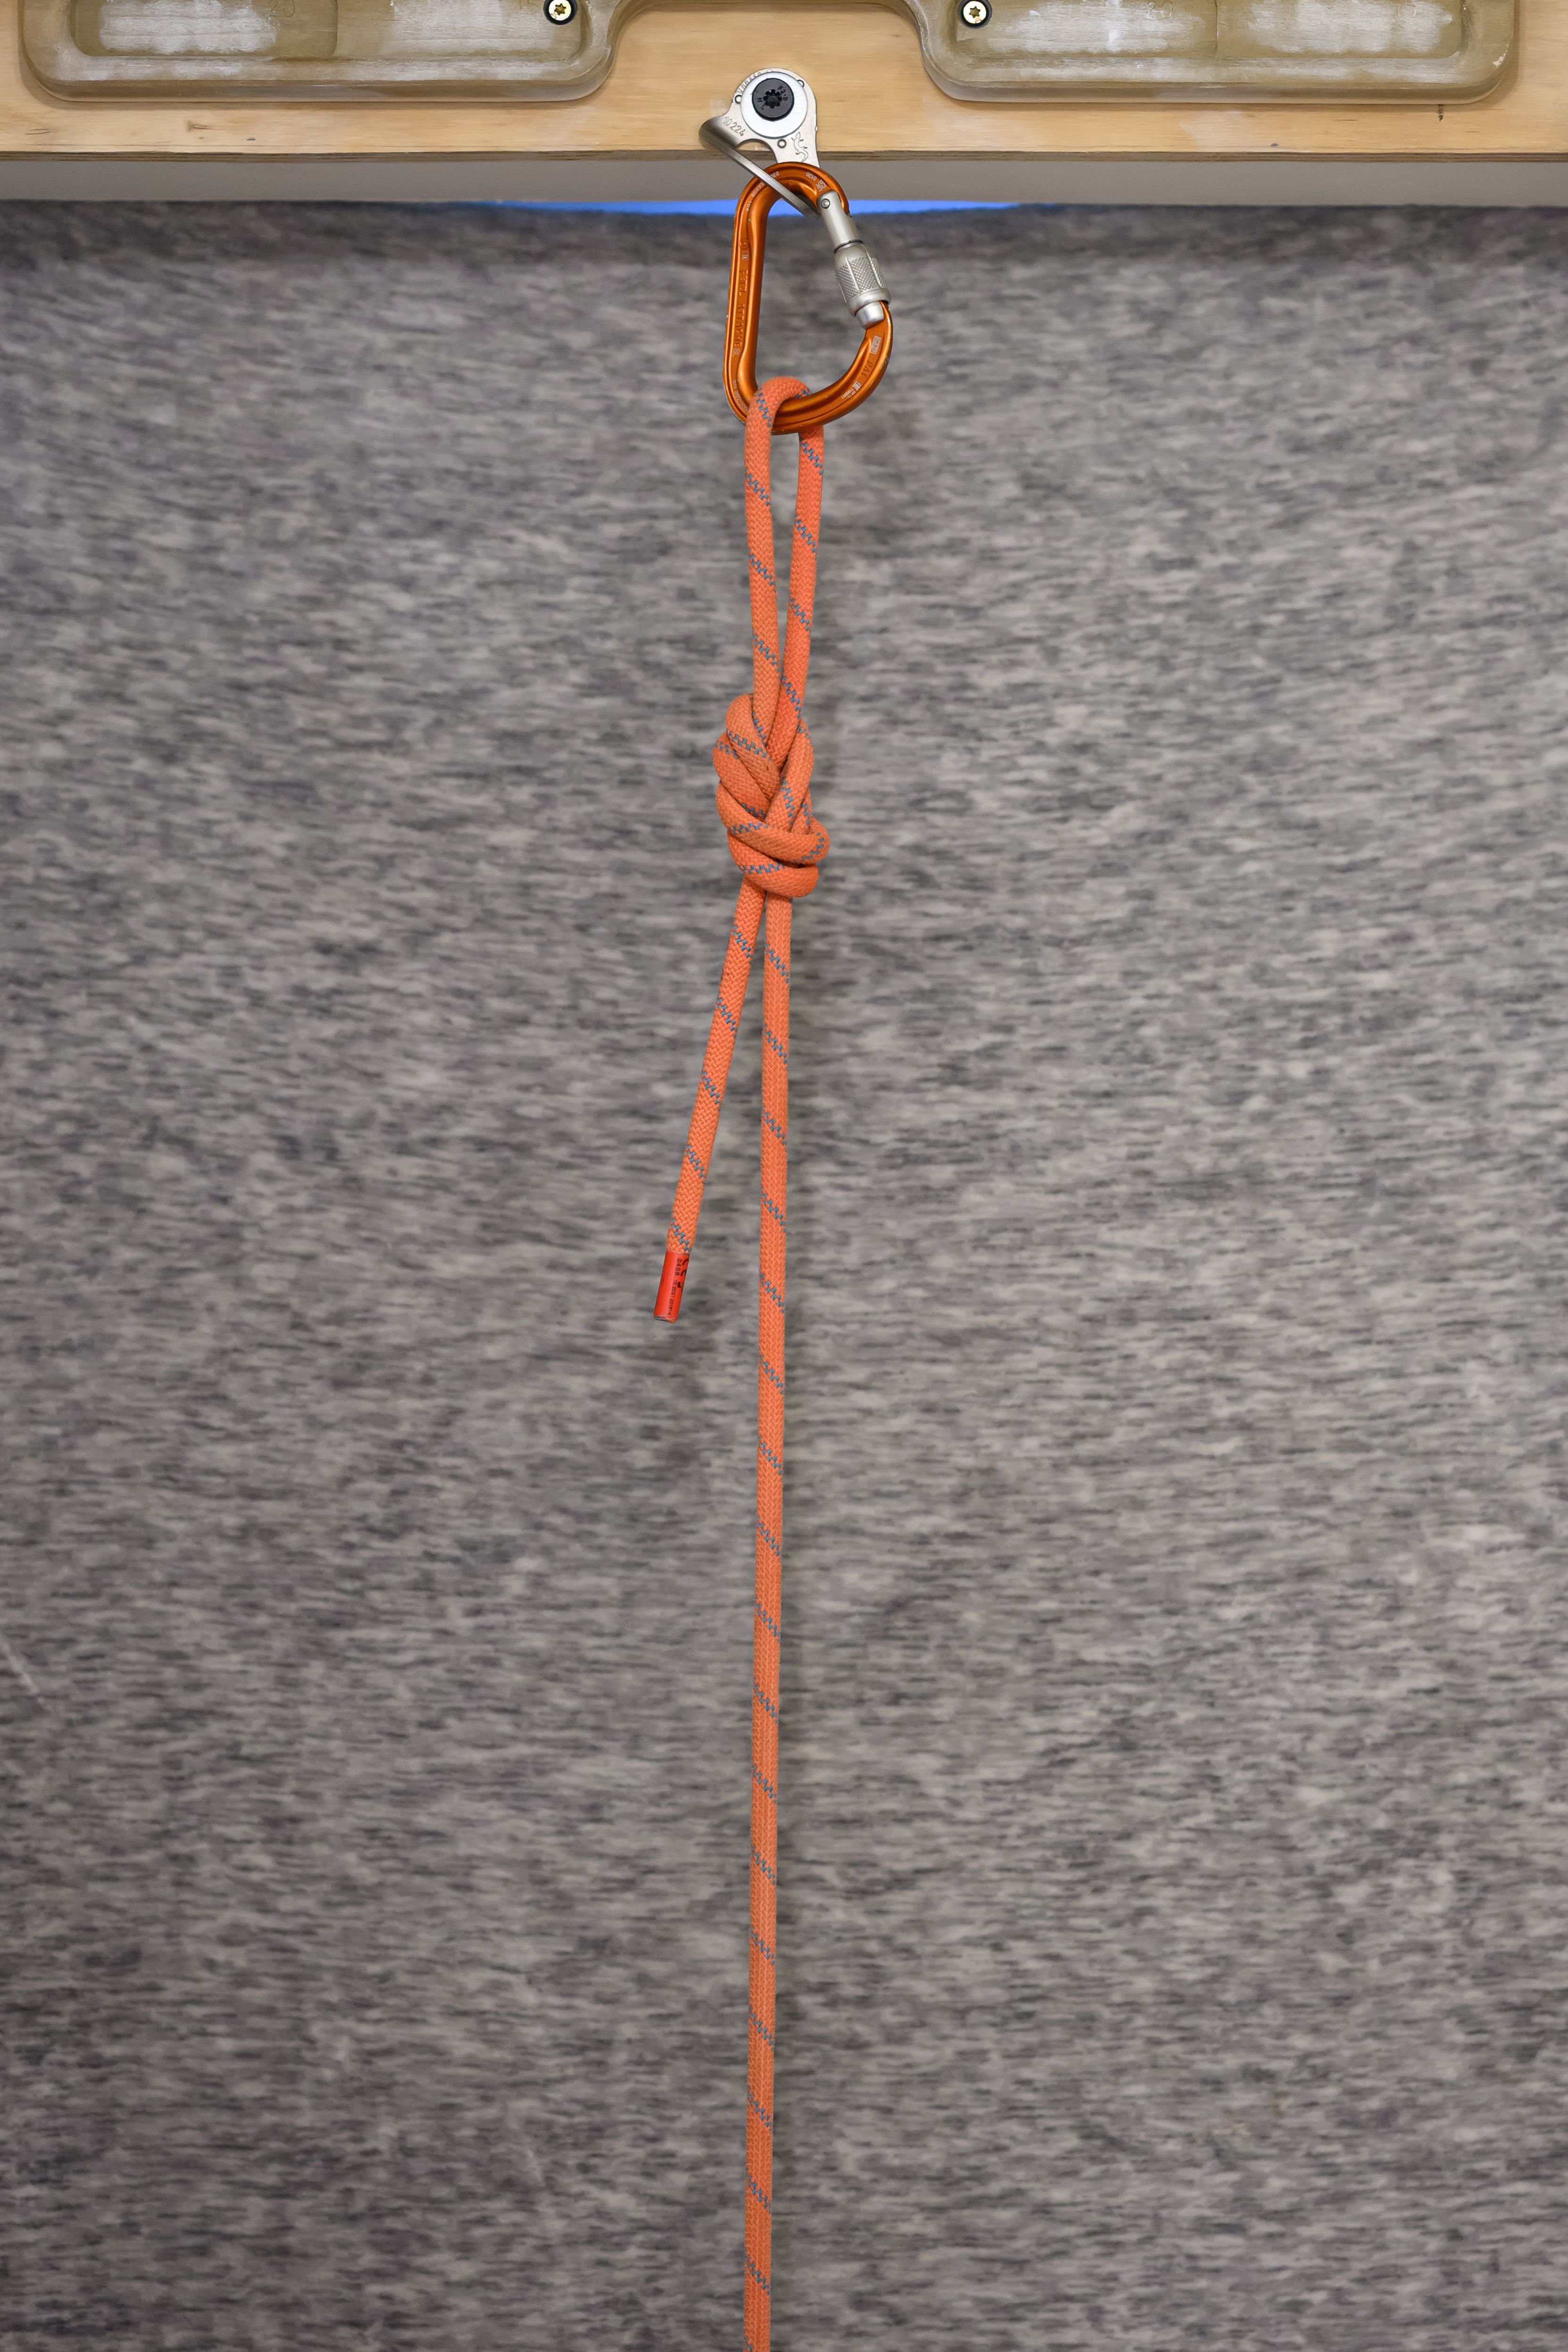
A reasonable tail length minimizes the risk of confusion while still being “super good enough” in the strength department.
Tether Clipped Incorrectly
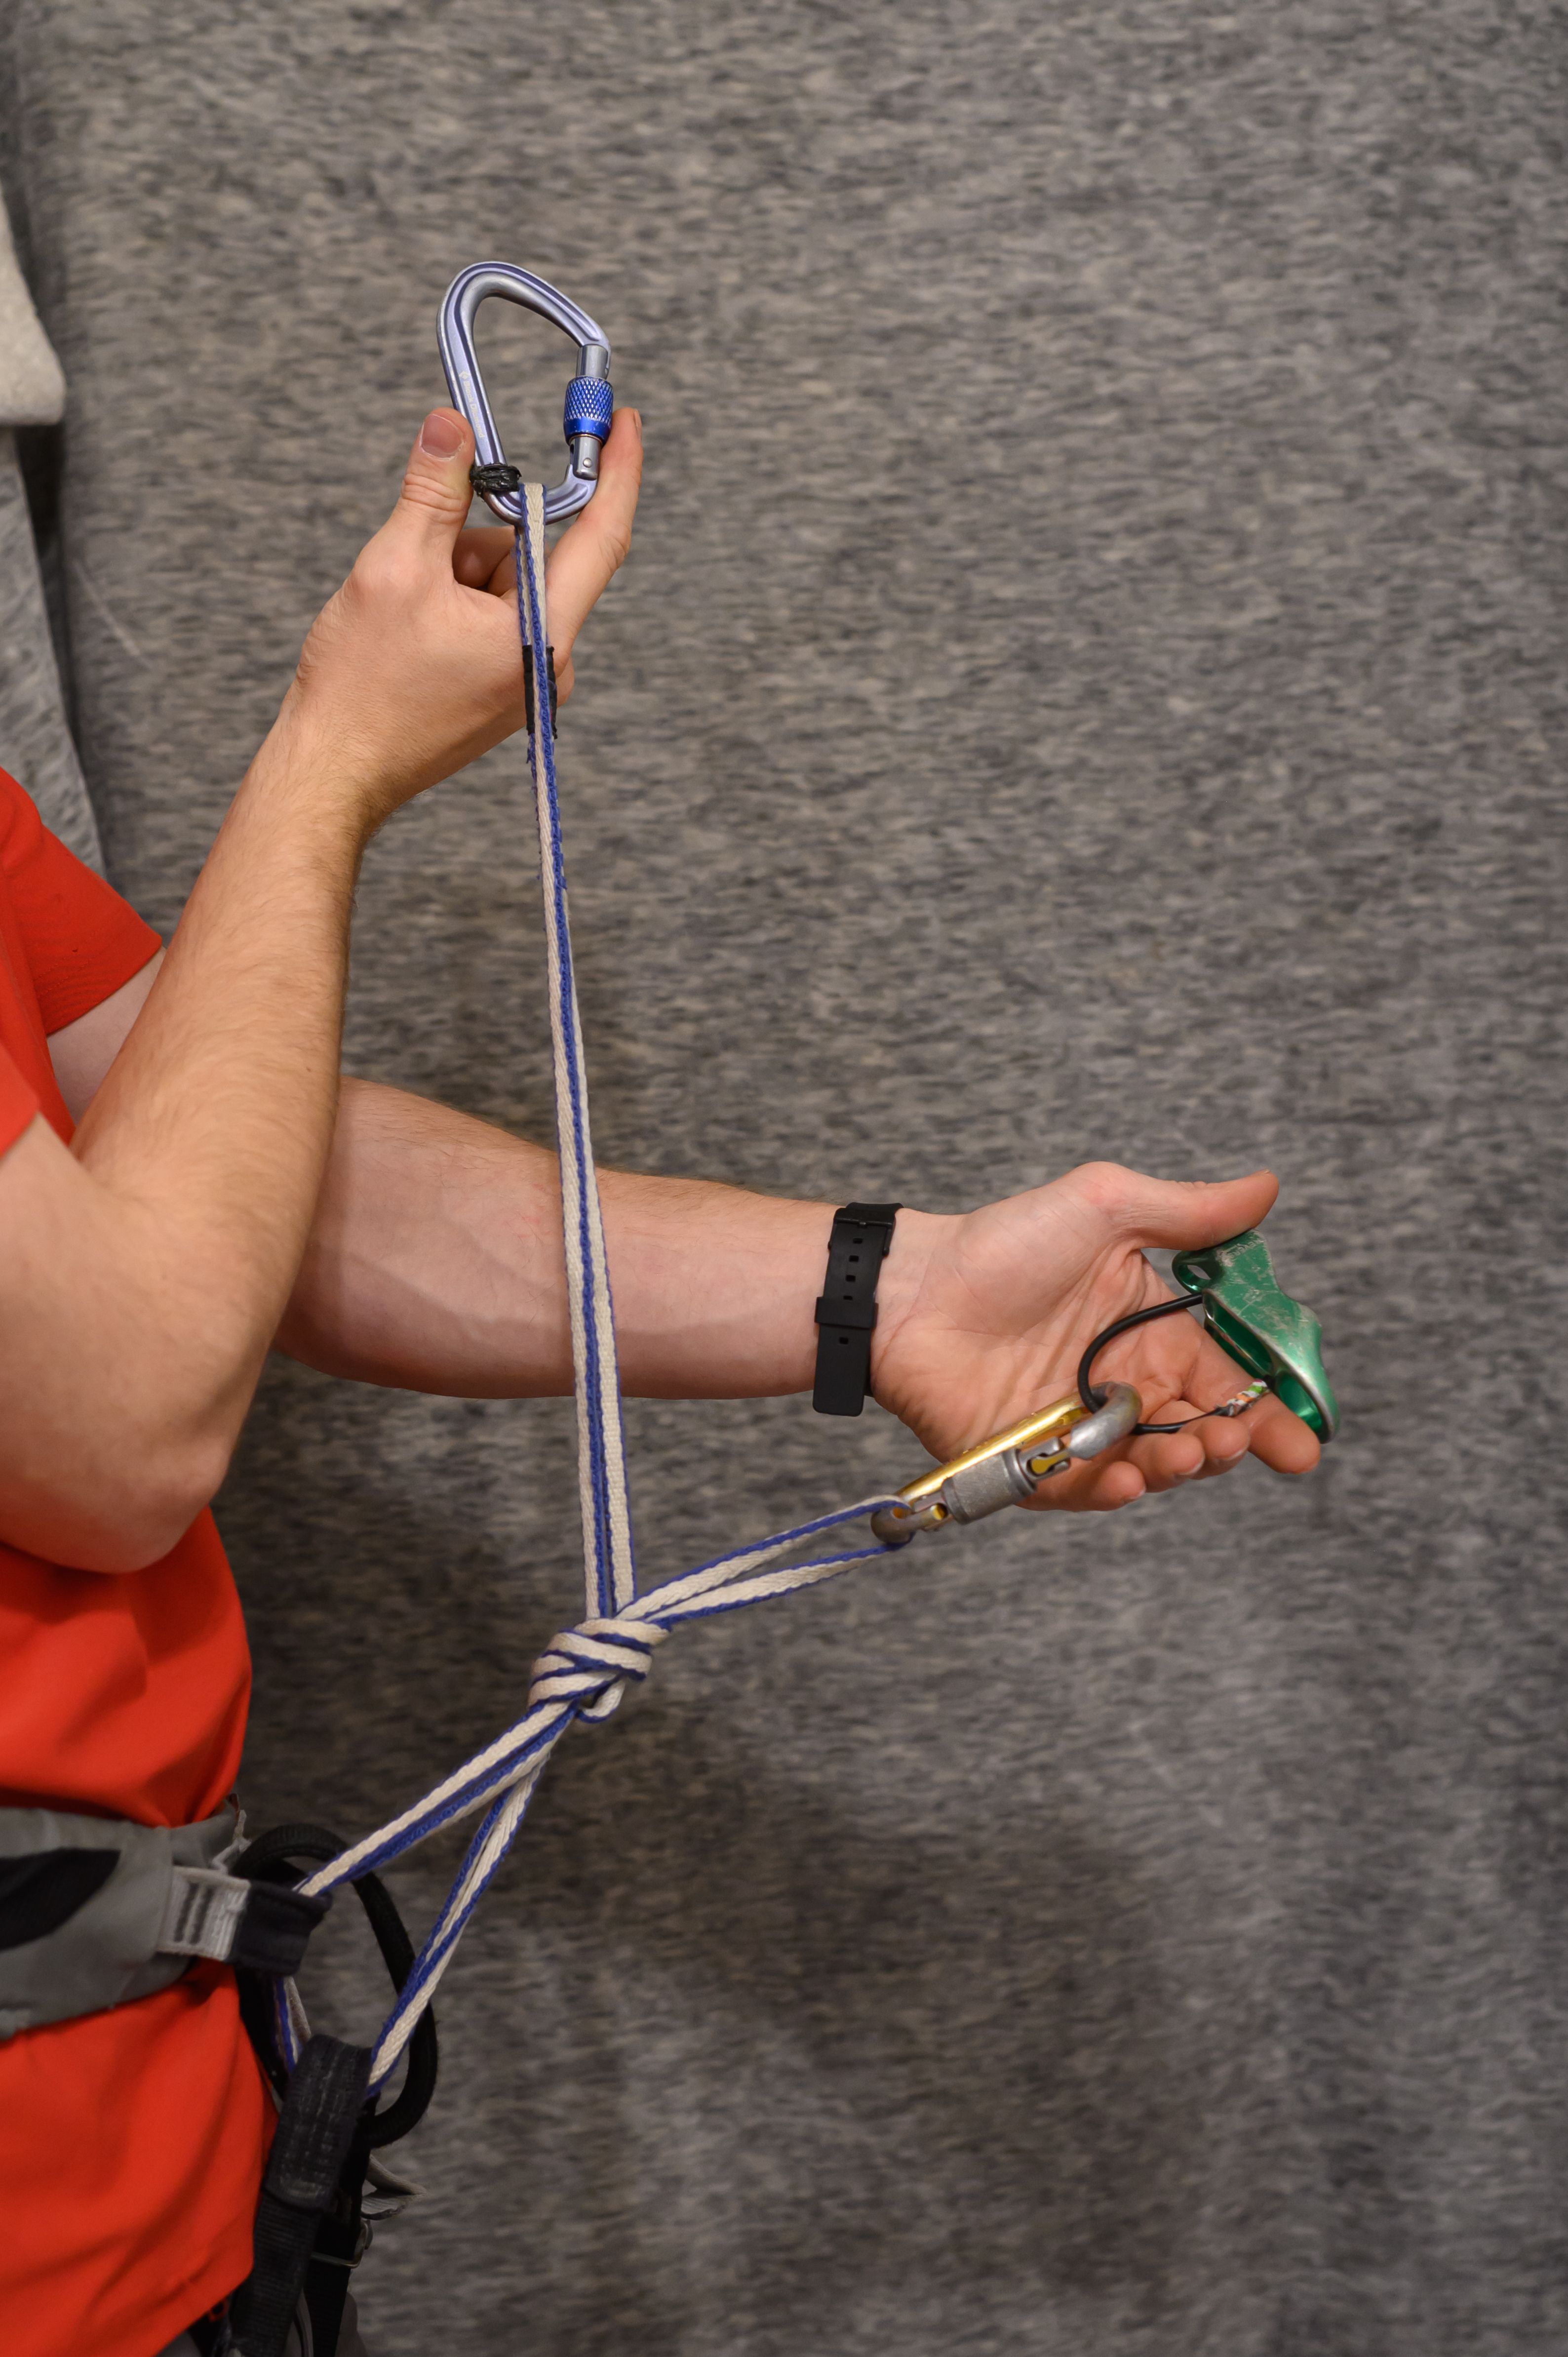
The last accident I want to highlight occurred in Alberta when a climber improperly clipped their personal tether before coming off rappel. They were using a sewn, double-length nylon sling with knots tied for adjustable lengths.
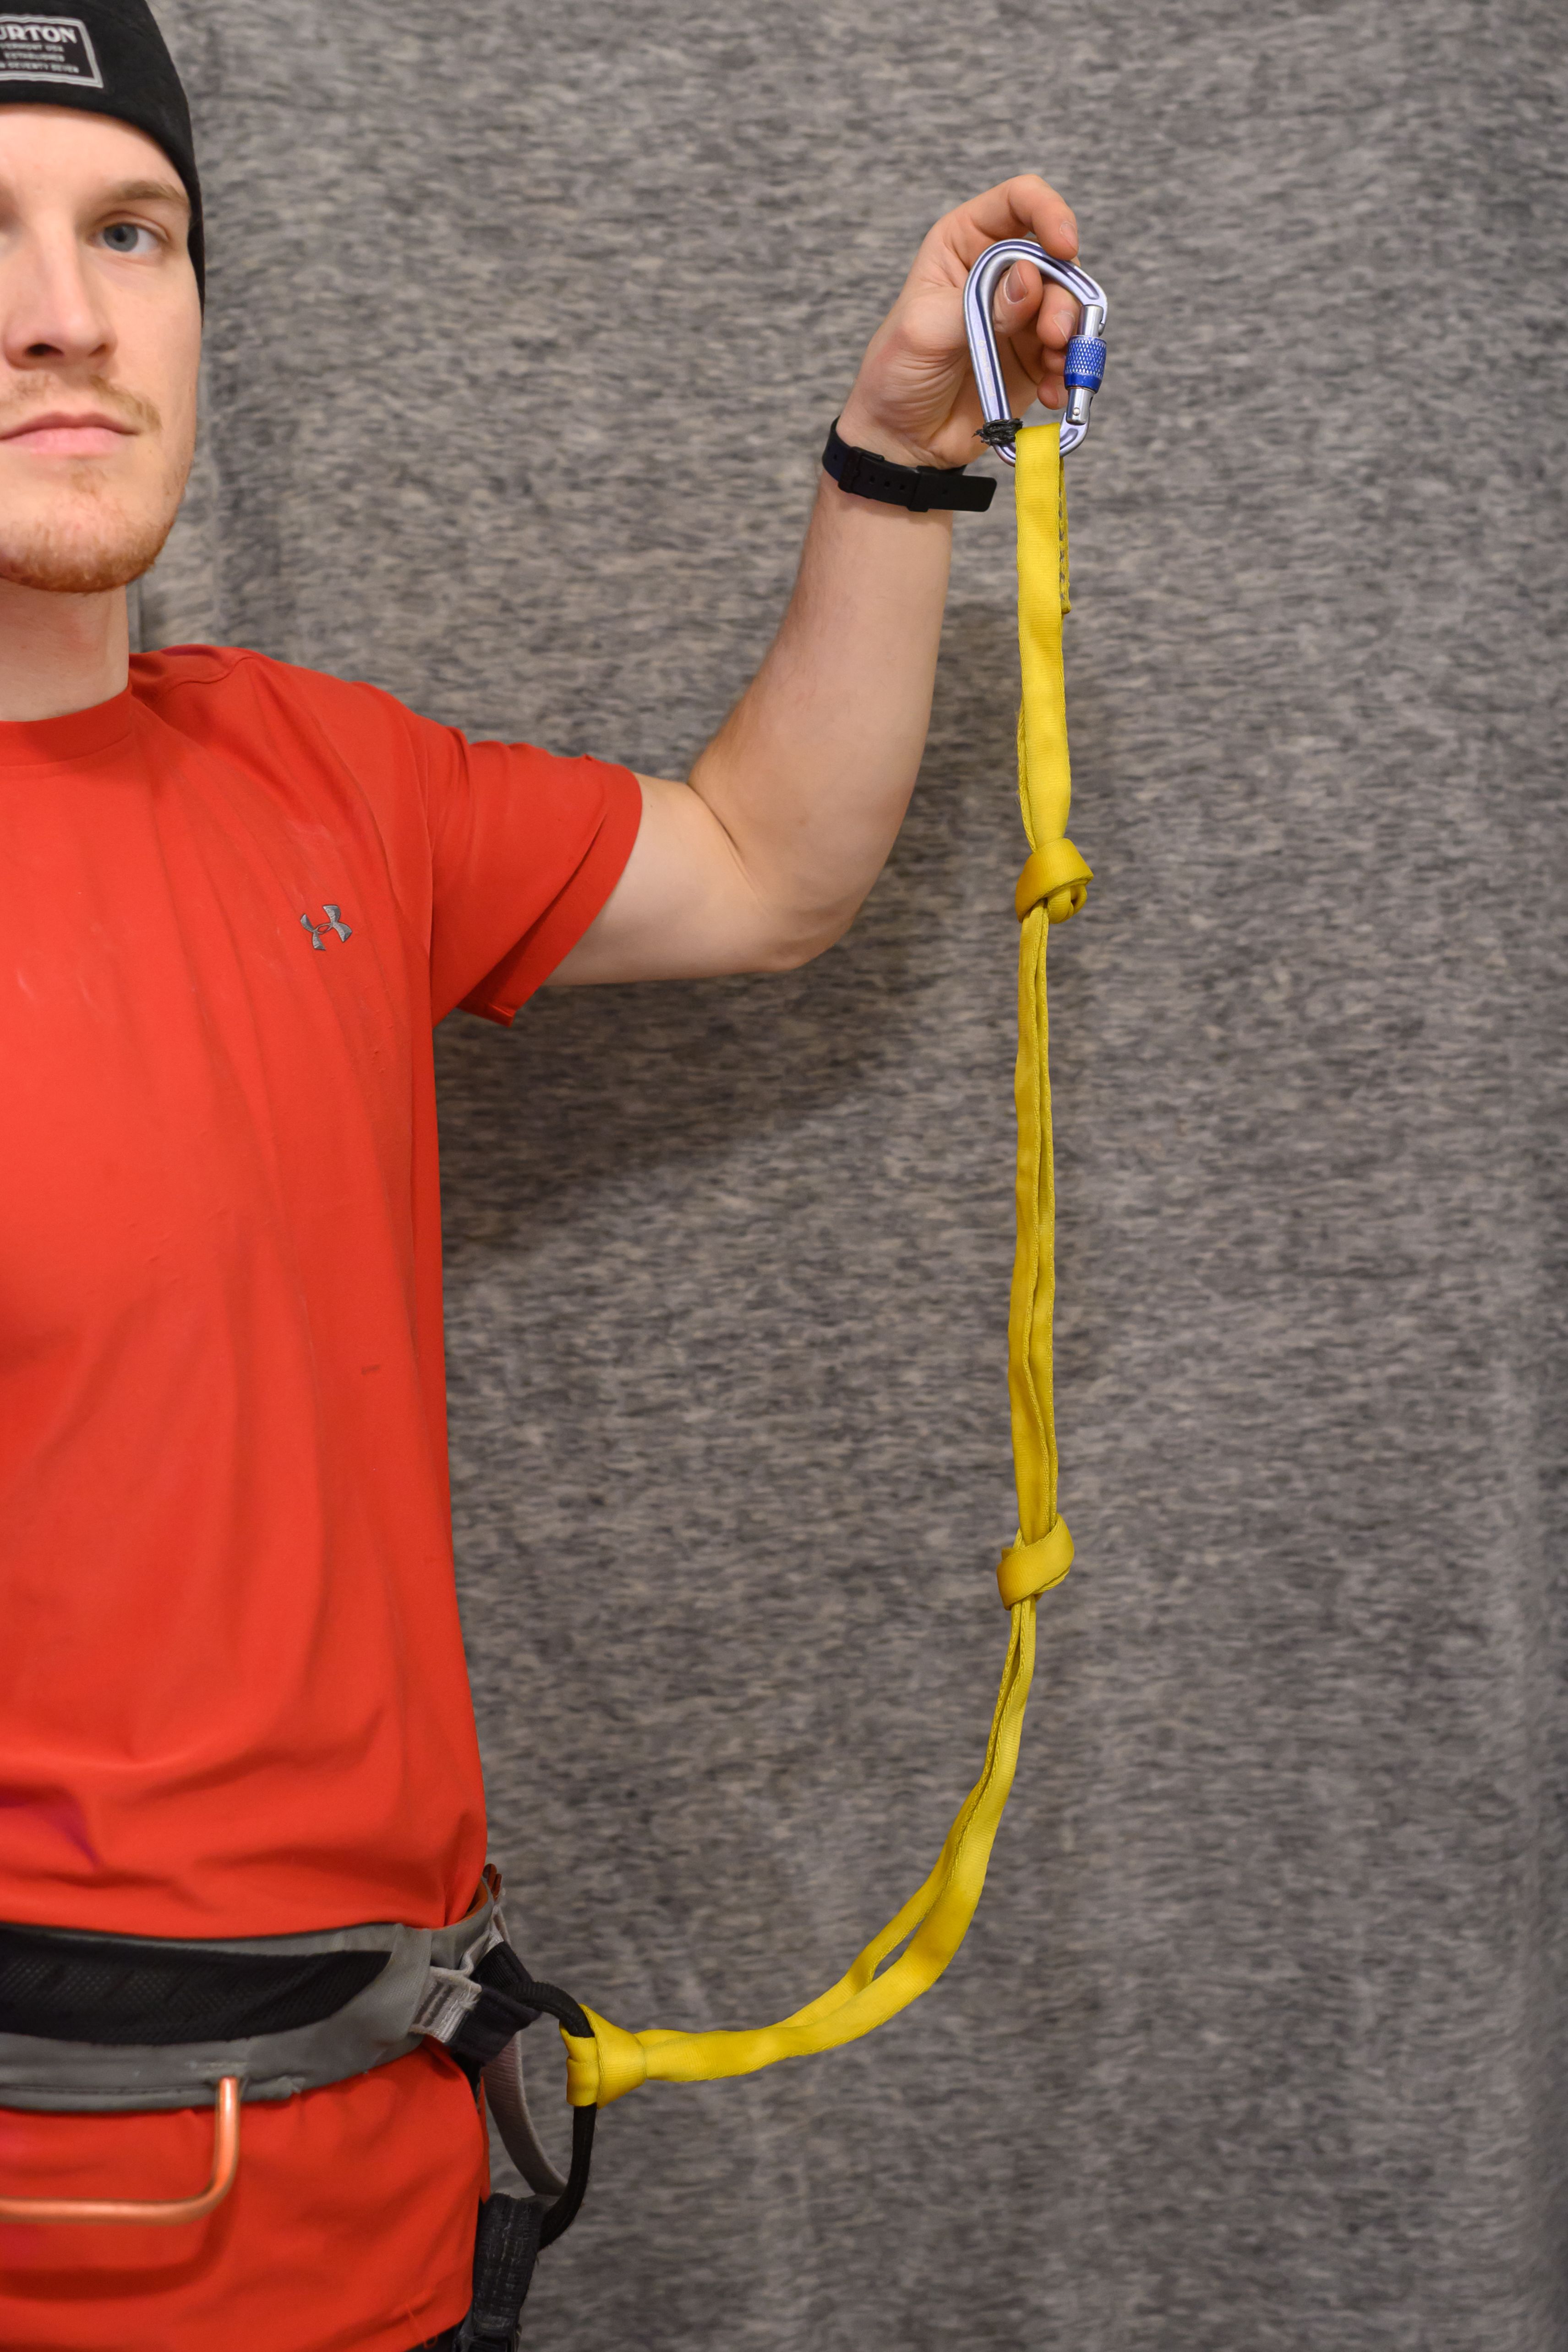
Somehow, the climber clipped the entire tether rather than the loop formed by a knot, creating a situation like this:
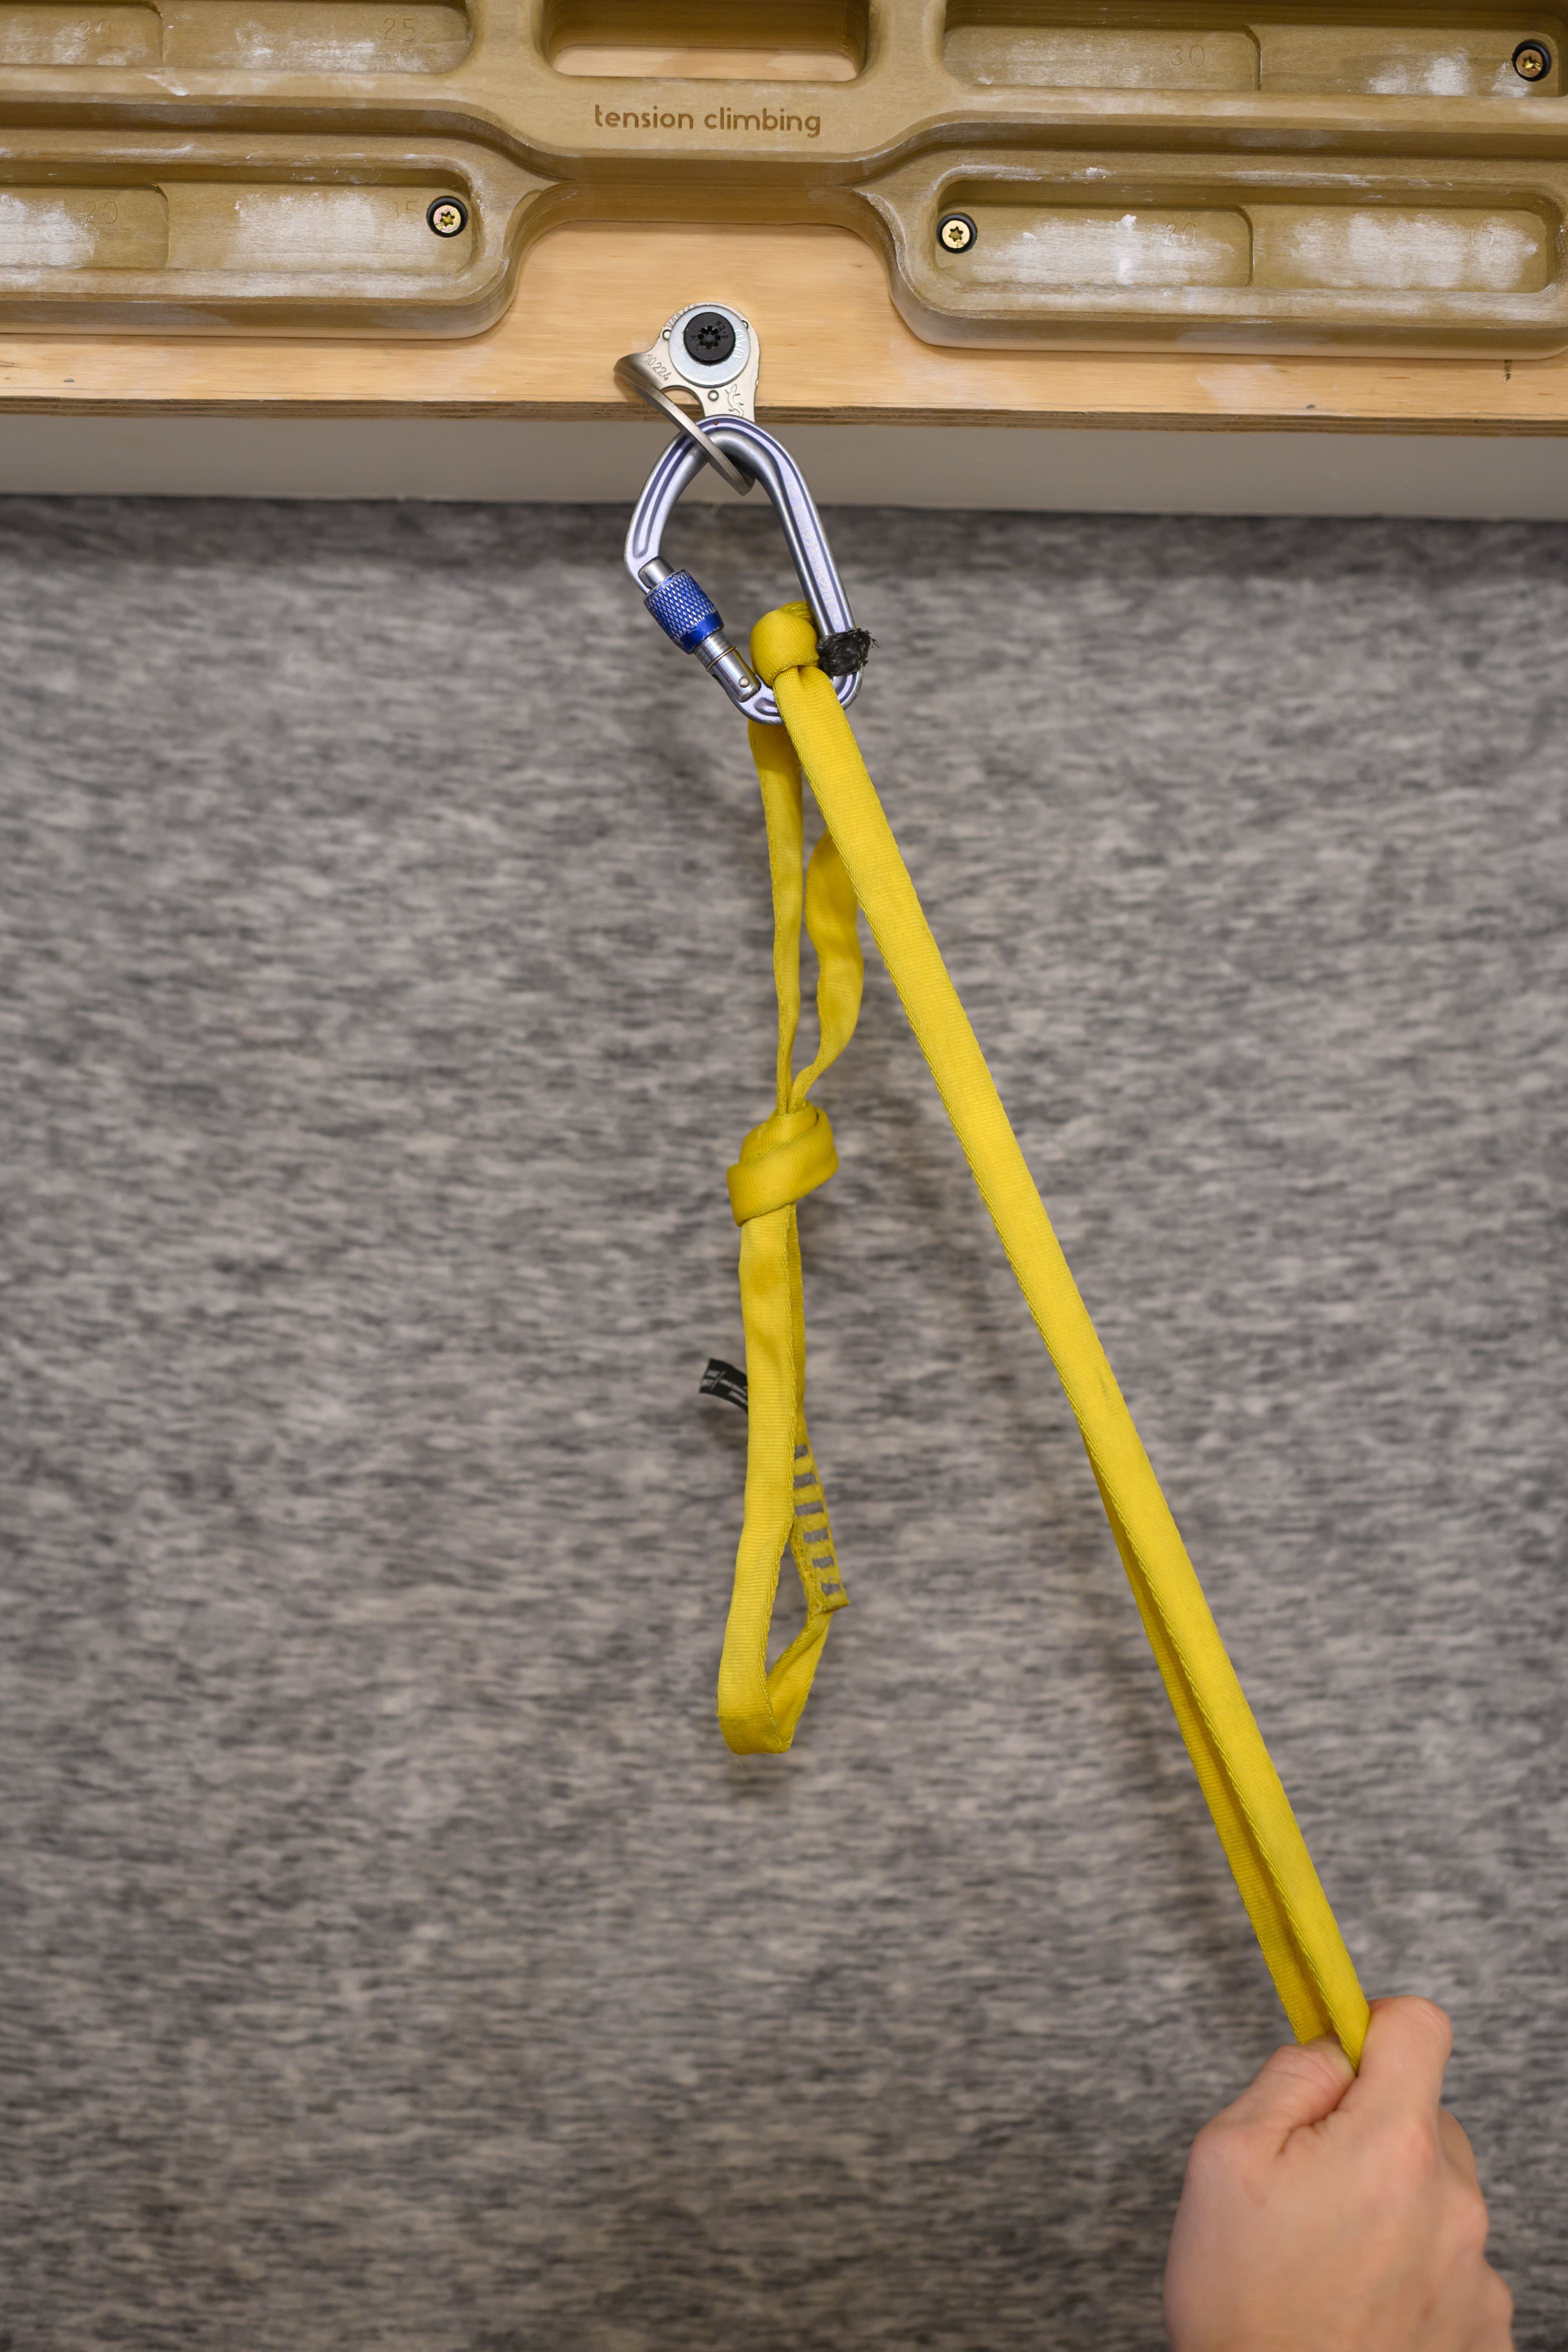
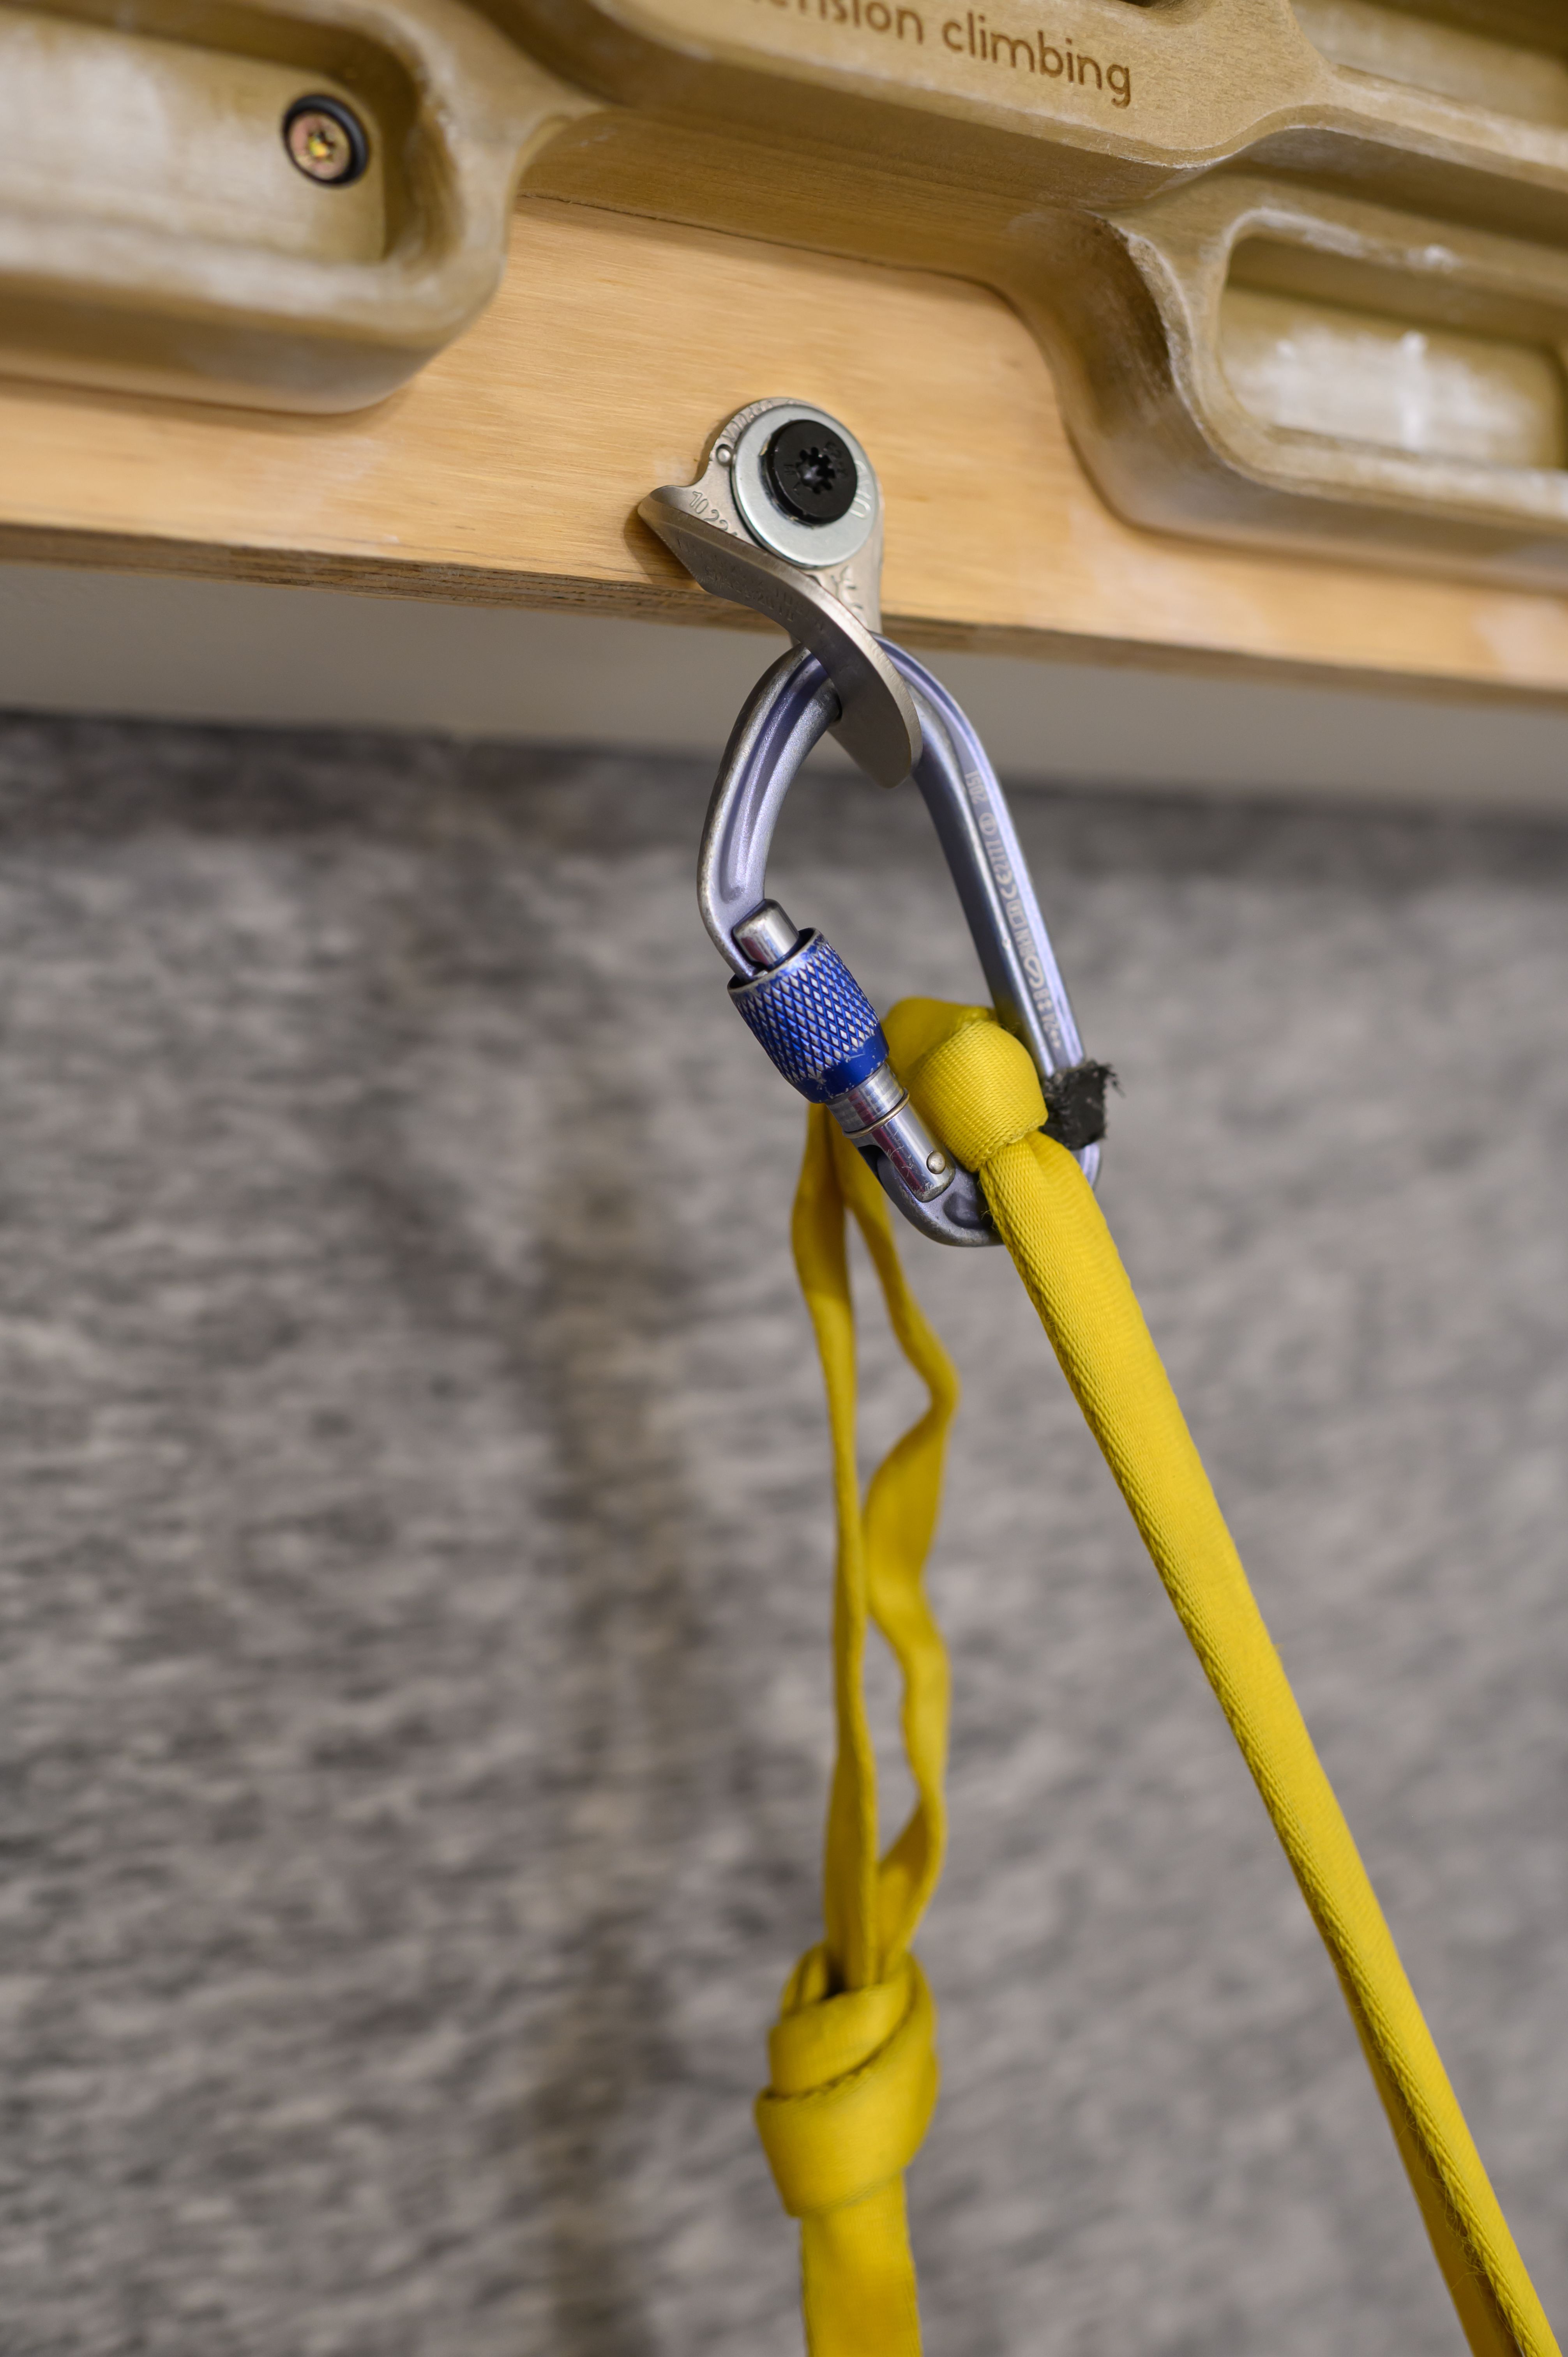
The bulky knot jammed partially into the carabiner, leading the climber to believe they were secure. When they undid their rappel device and weighted the tether, the knot slipped through, and they fell 35 meters.
Lessons
Use a second carabiner to clip your limiting knots
Best practices for rappelling have evolved a lot since I started climbing. While I used this system myself at one point, tethers with multiple knots can create visual confusion and require unclipping to adjust length, increasing the chance of error. If you insist on this system, handle length adjustments as shown here:
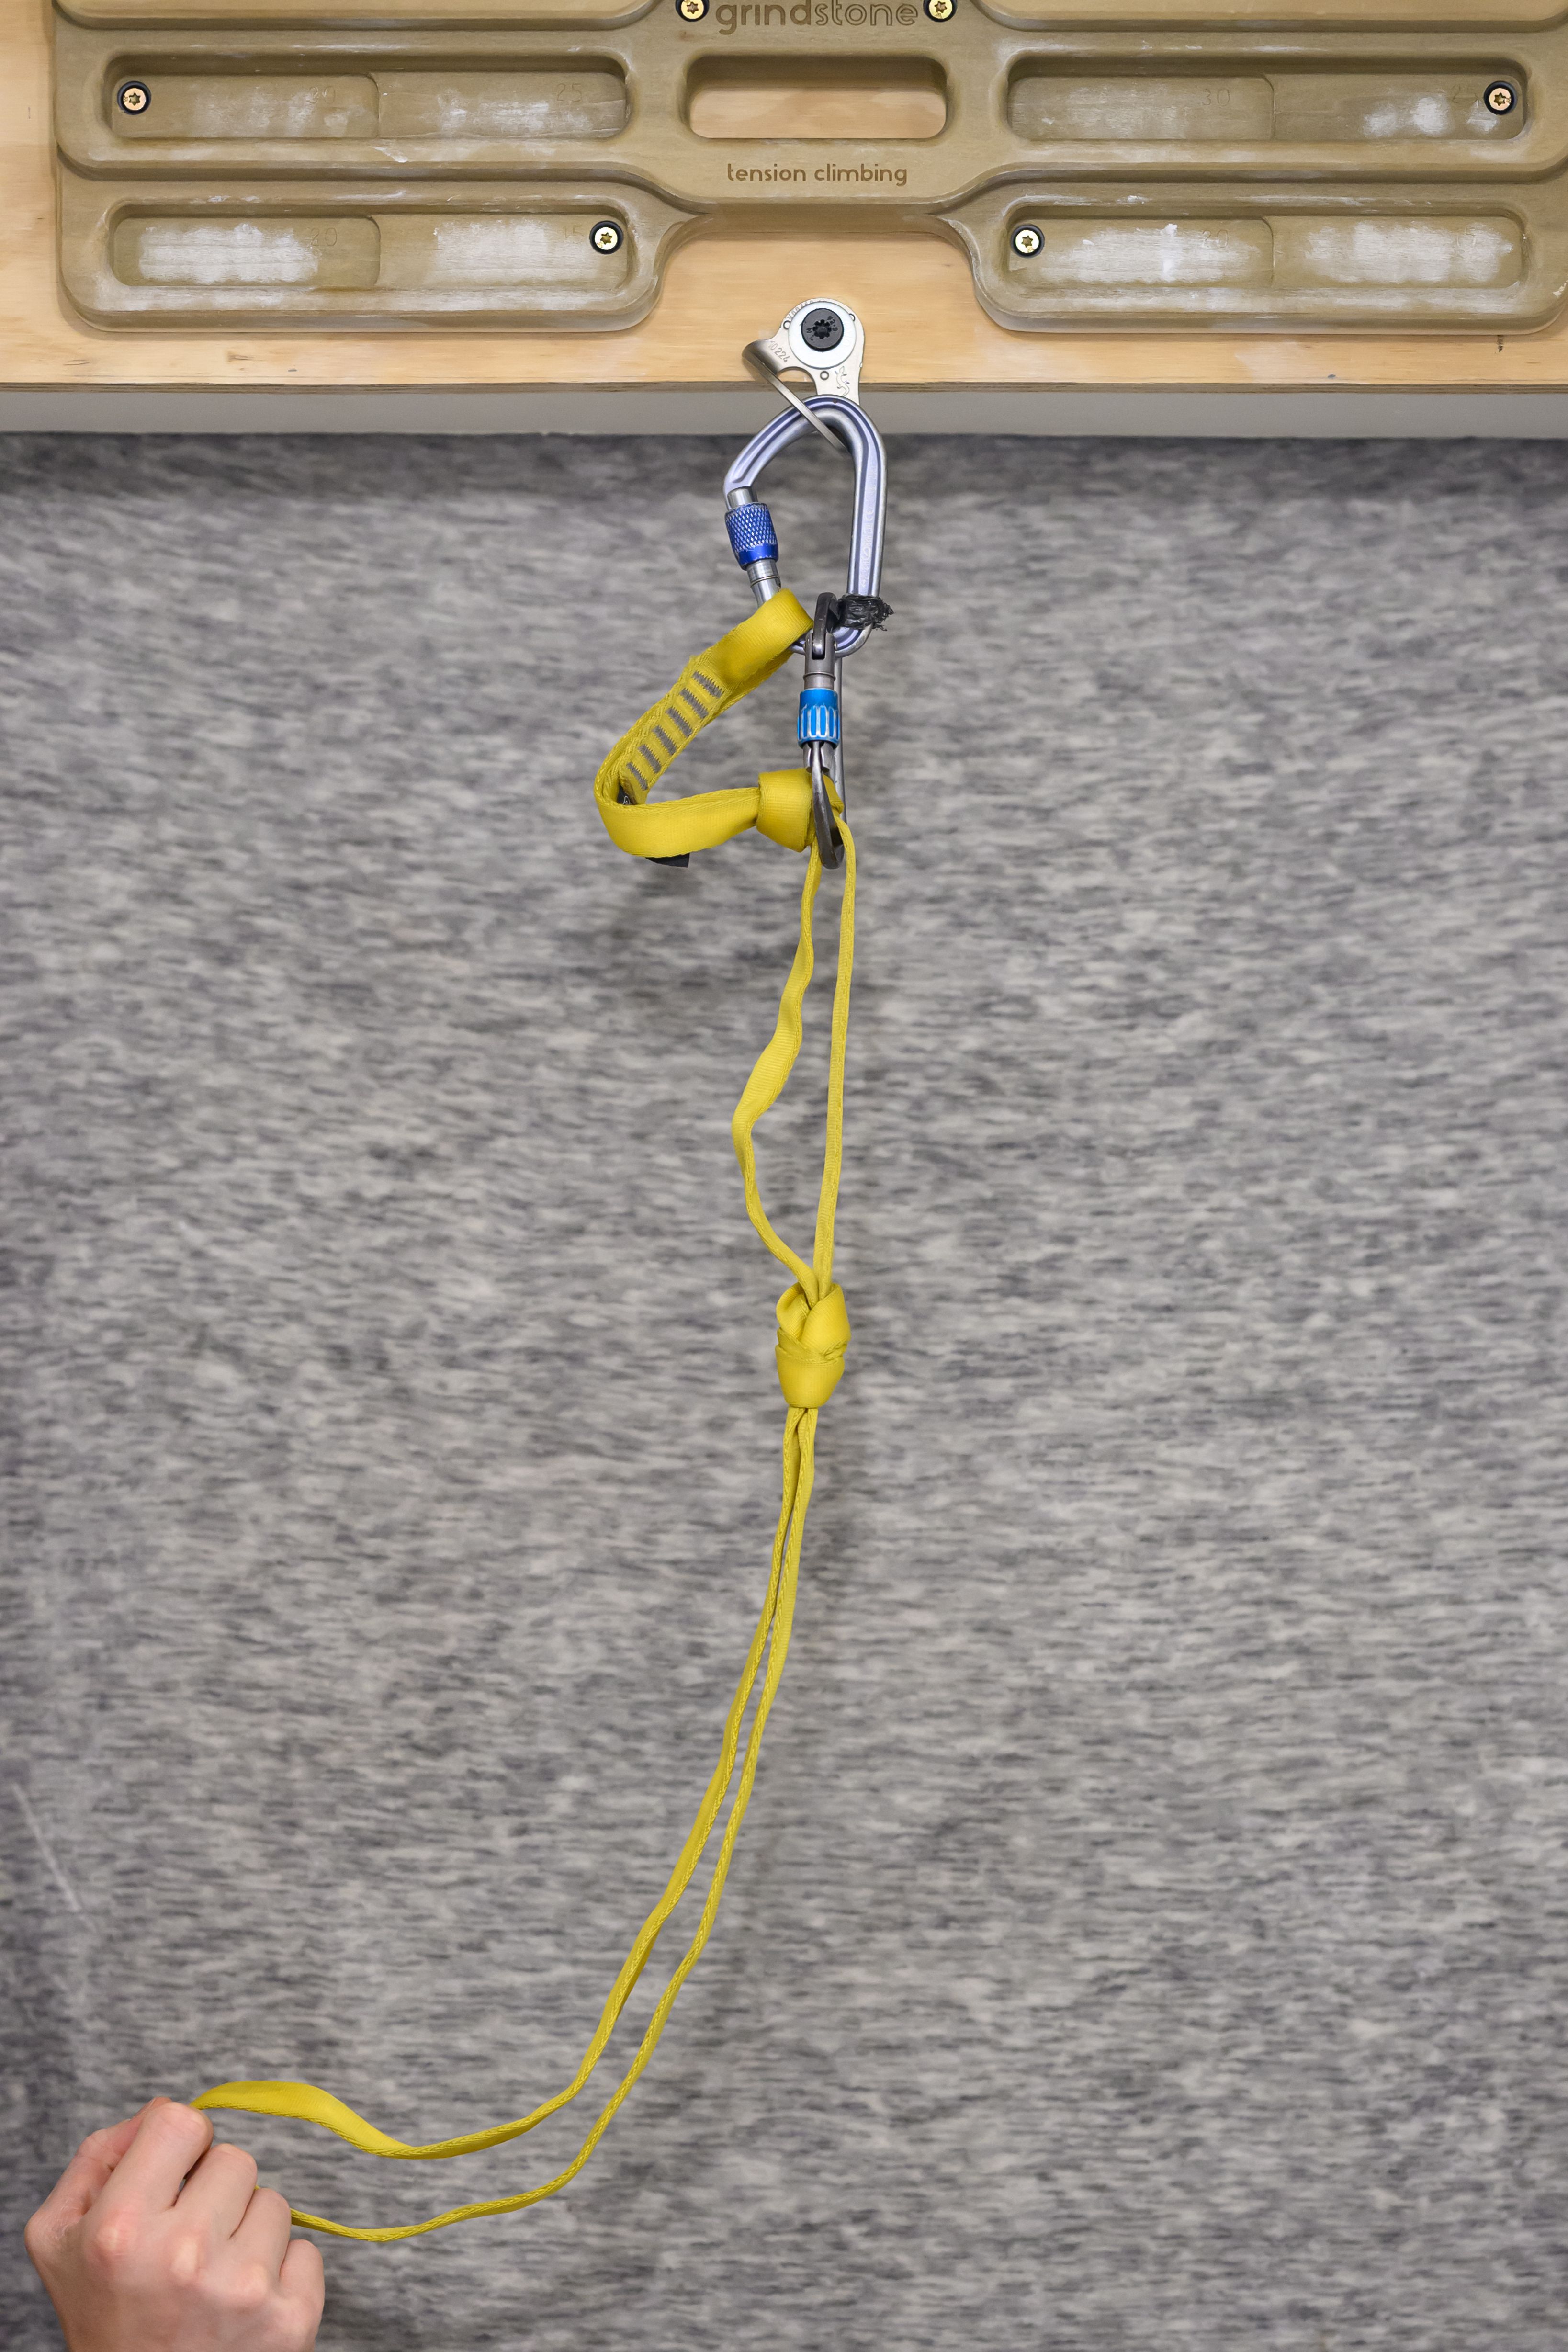
This way there is no instance in which you fully unclip the carabiner from your attachment system.
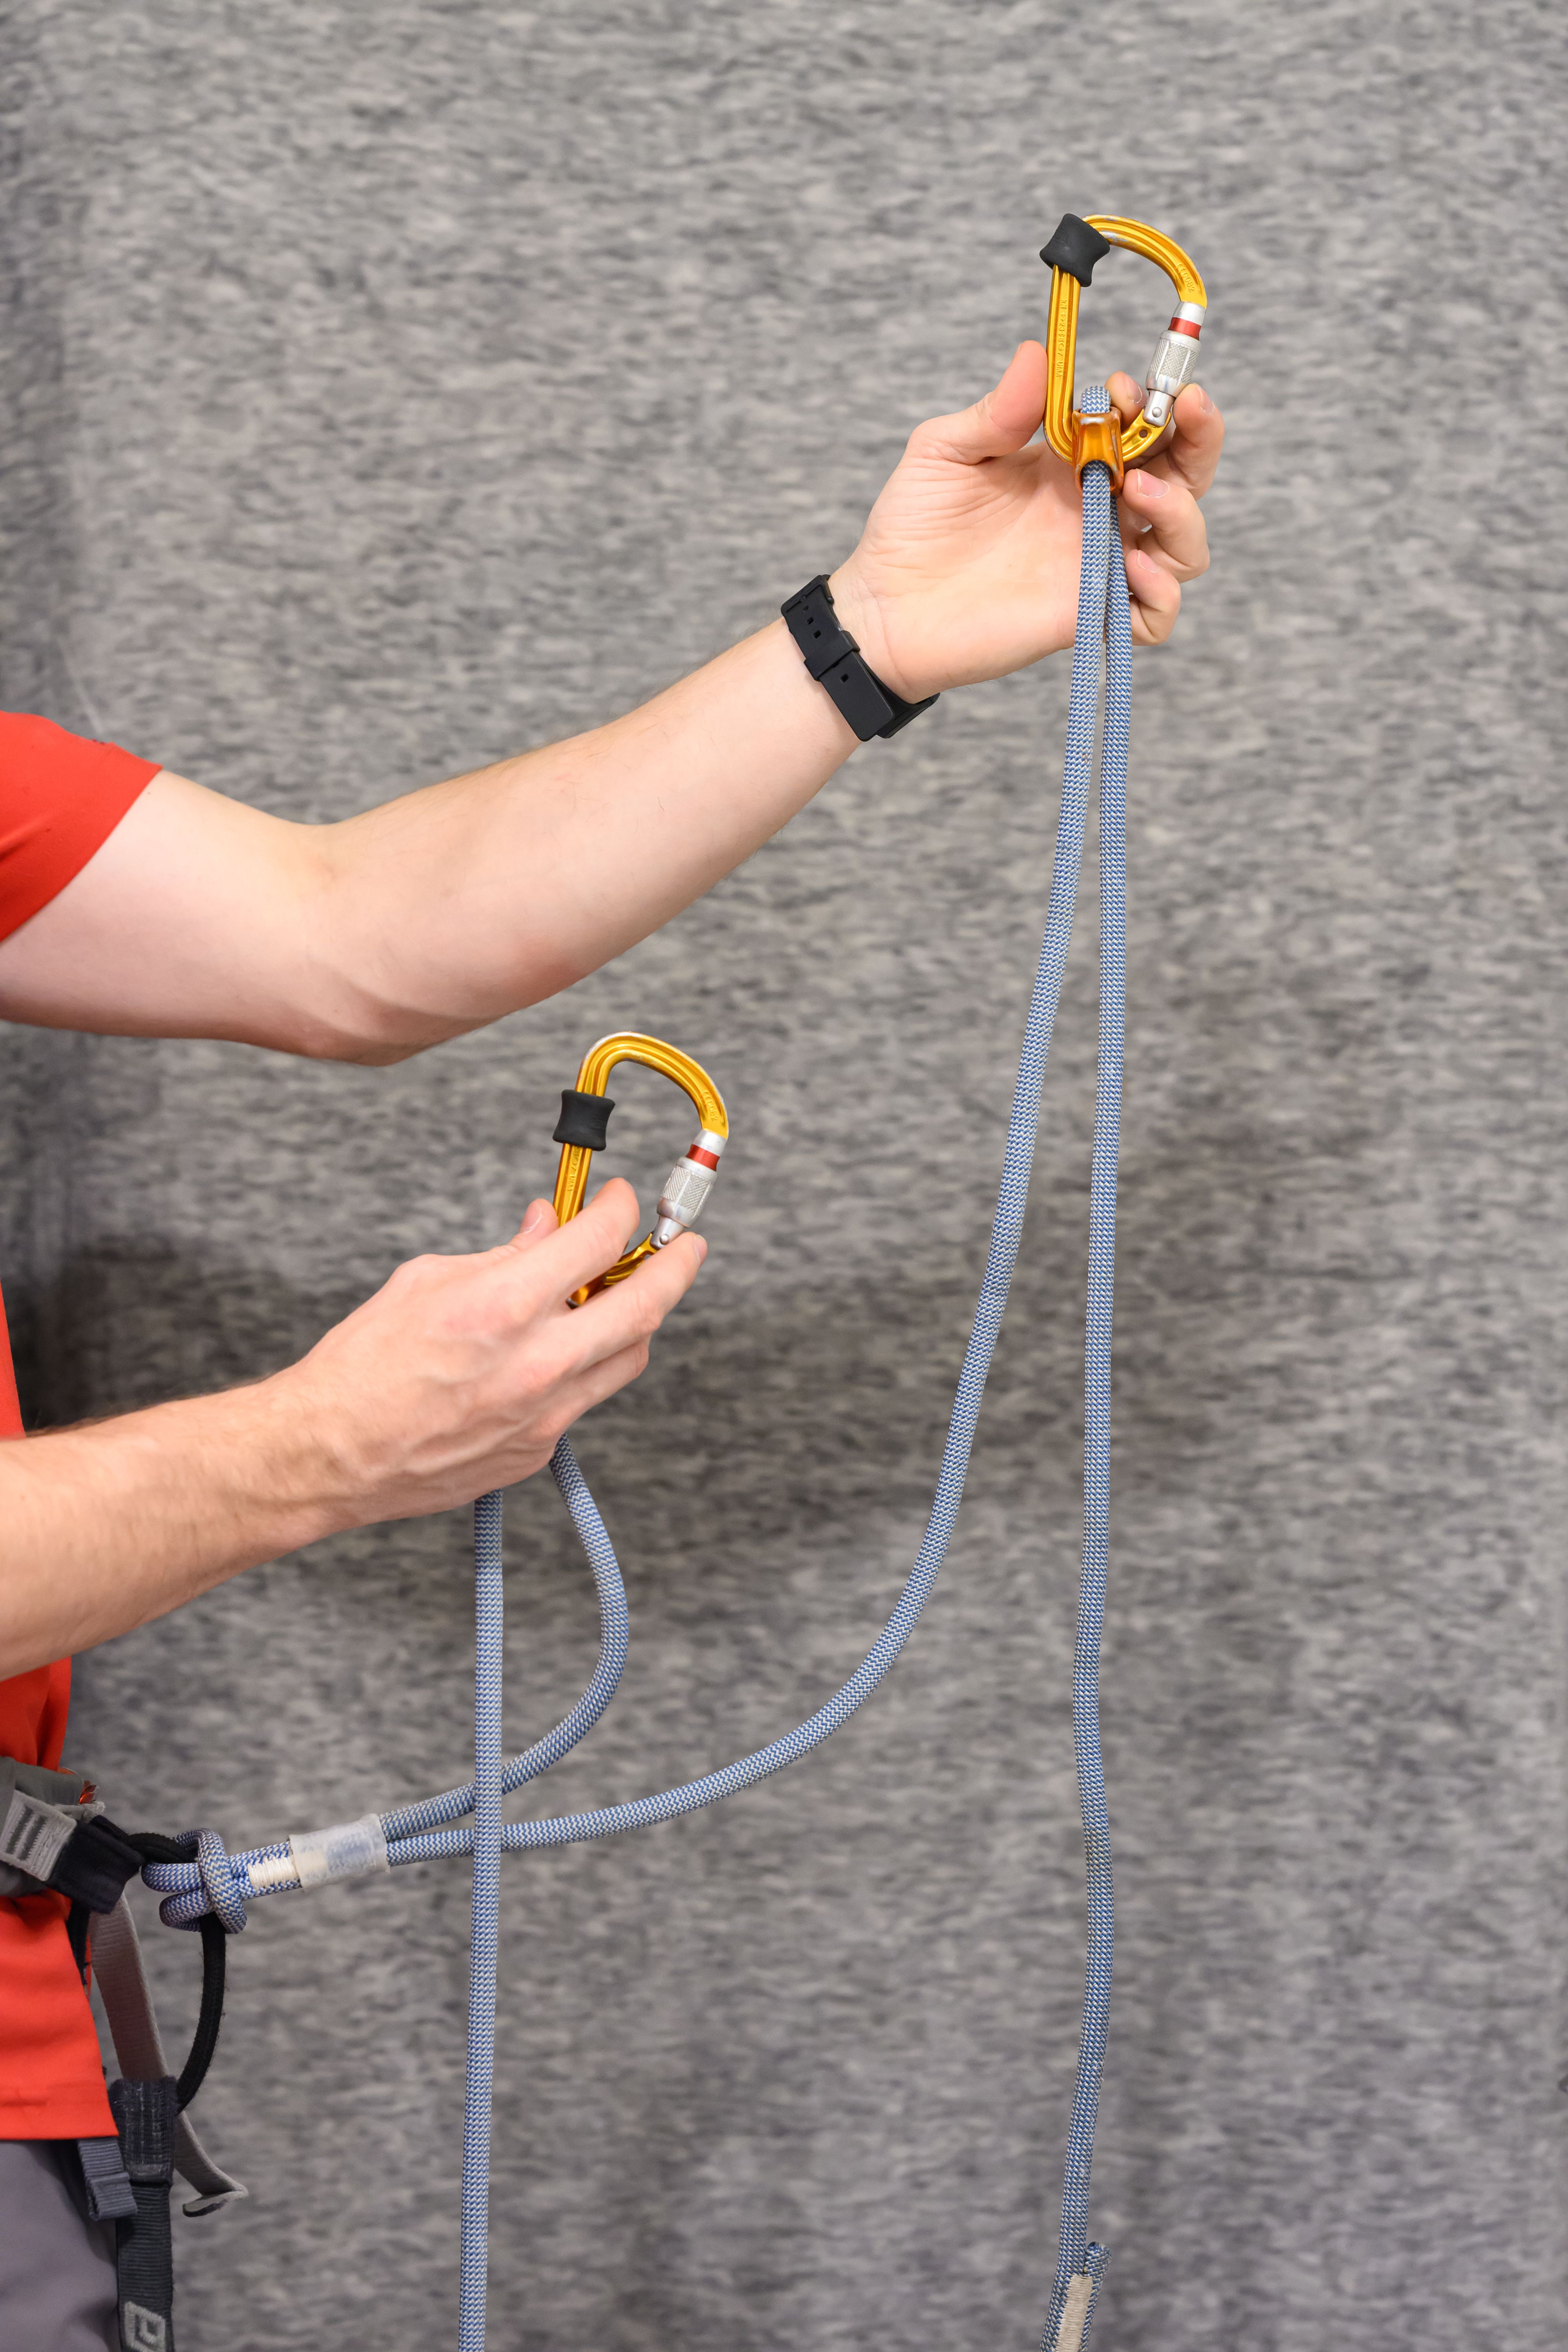
Use a system that doesn’t require unclipping to adjust length
A modern tether system, such as the Petzl Connect, offers adjustable length while keeping the carabiner captive. Alternatively, tie a sling with two distinct loops of different lengths: one for clipping in and one for your rappel device. This setup creates visually distinct attachment points, although it doesn’t allow you to adjust length, so it’s better for shorter sections of rappelling.
Wrap-Up
Whew! That was a lot of analysis of a few small mistakes made in very specific circumstances. If this interested you and you want to get into the weeds on a particular area of climbing, consider booking a course with Alpenglow Guiding. I strive to ensure my instruction aligns with current best practices, including incorporating lessons from Accidents in North American Climbing every year. If you felt lost reading this, don’t worry! Alpenglow Guiding teaches the full range of climbing skills, from the gym to the alpine. Lastly, I want to thank everyone who contributed to the American Alpine Club’s accident reports. Sharing these details demonstrates a commitment to the broader climbing community’s safety and knowledge, which is truly admirable. To everyone stuck at home during the muck season:
Stay safe out there!
-Tom